
The ideas below run from a bottom shelf for raw meats to upright bags filed like paper in a drawer, and the one that belongs in your kitchen depends on whether you are organizing a drawer-style bottom freezer, an upright single-door model, or the full-span shelves of an American fridge freezer.
What they share is a bias toward seeing what you have before you open it: one setup files frozen soup in upright bags with labels facing out, another keeps produce visible in clear bins, and most rely on labels and stackable containers to keep order from sliding into chaos.
1. Store Raw Meats on Bottom
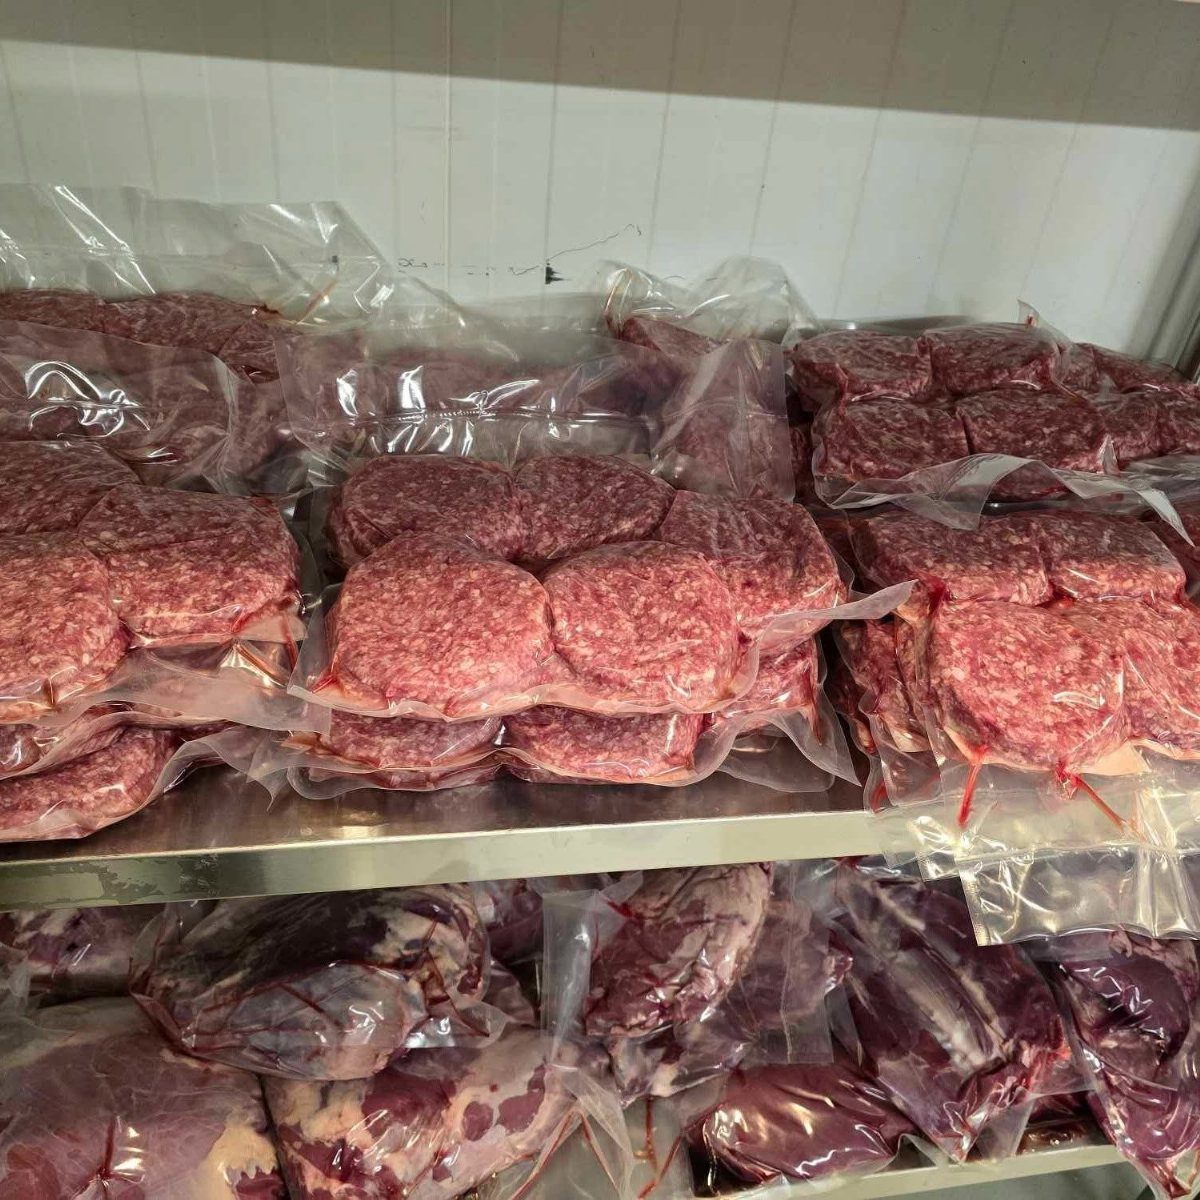
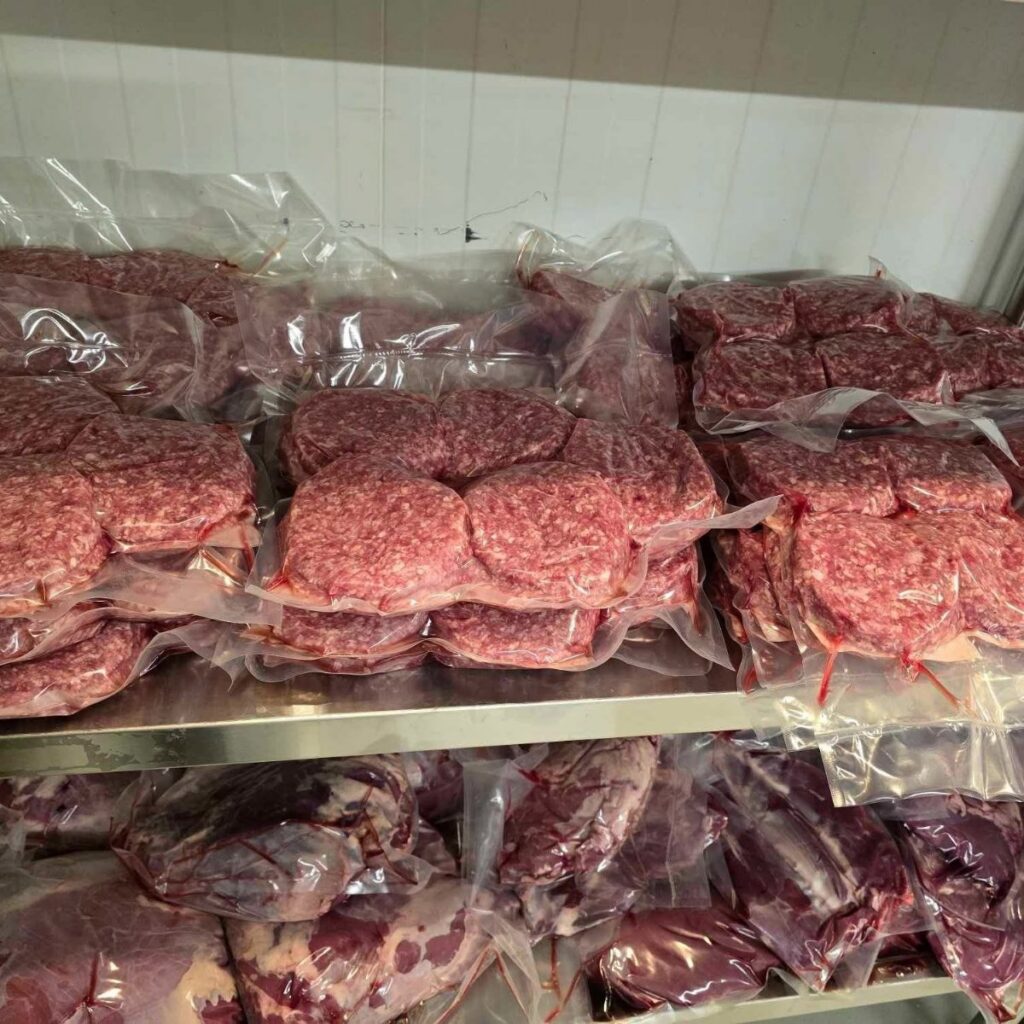
Raw meat belongs on the lowest shelf of any refrigerator, full stop. Juices from a leaking package won’t drip onto your produce or leftovers if there is nothing below them to spoil.
A shallow bin or tray under the meat catches any runoff before it pools in the crisper drawers.
In my last rental, the bottom shelf sat directly above the vegetable bins with no buffer at all, so that tray saved me more than once.
This placement also puts the heaviest items where they are easiest to slide in and out without lifting.
If your fridge has a drawer-style freezer below, the same rule applies there too; vacuum-sealed packs of ground beef or chops stay on the bottom tier.
2. Use Clear Containers
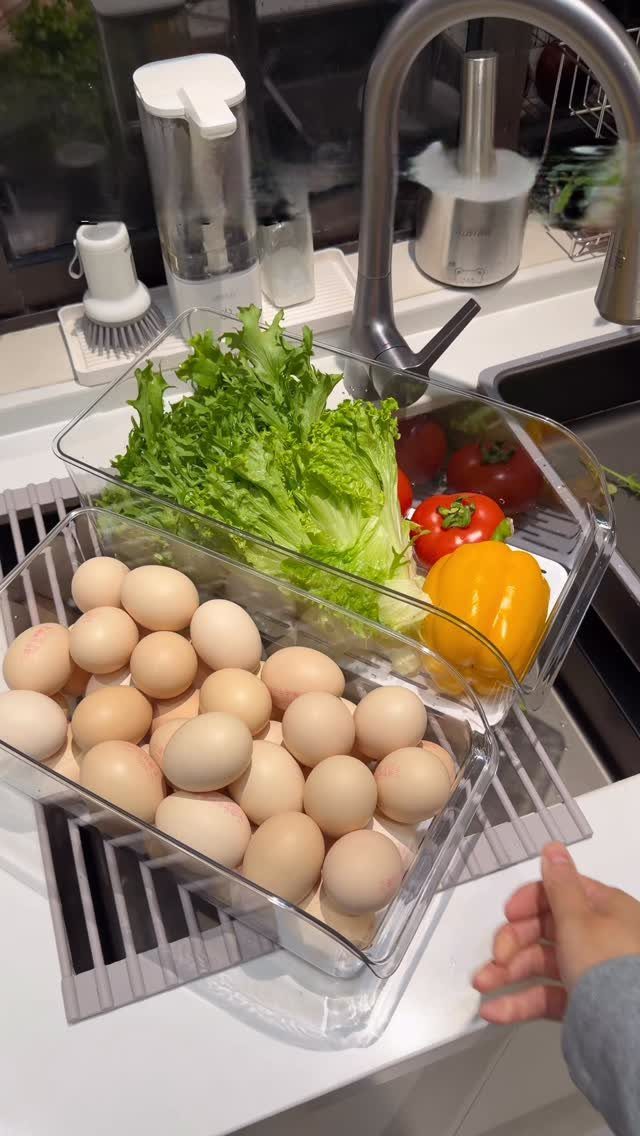
Clear bins turn a crowded shelf into something you can read at a glance. Clear containers work for lettuce and tomatoes in one, eggs in another, and cheeses and deli meats keep just as well the same way.
Pick a size that matches what you actually buy. Too large and the bin becomes a dumping ground; too small and you are stacking containers to make them fit.
I measure my shelf depth before I buy anything now, after one set of bins left an inch of wasted space at the back that drove me nuts.
For produce, match the bin to the humidity your vegetables need. Leafy greens want a closed vent and higher humidity; apples and pears need the vent open so their ethylene gas can escape.
3. Use Airtight Containers
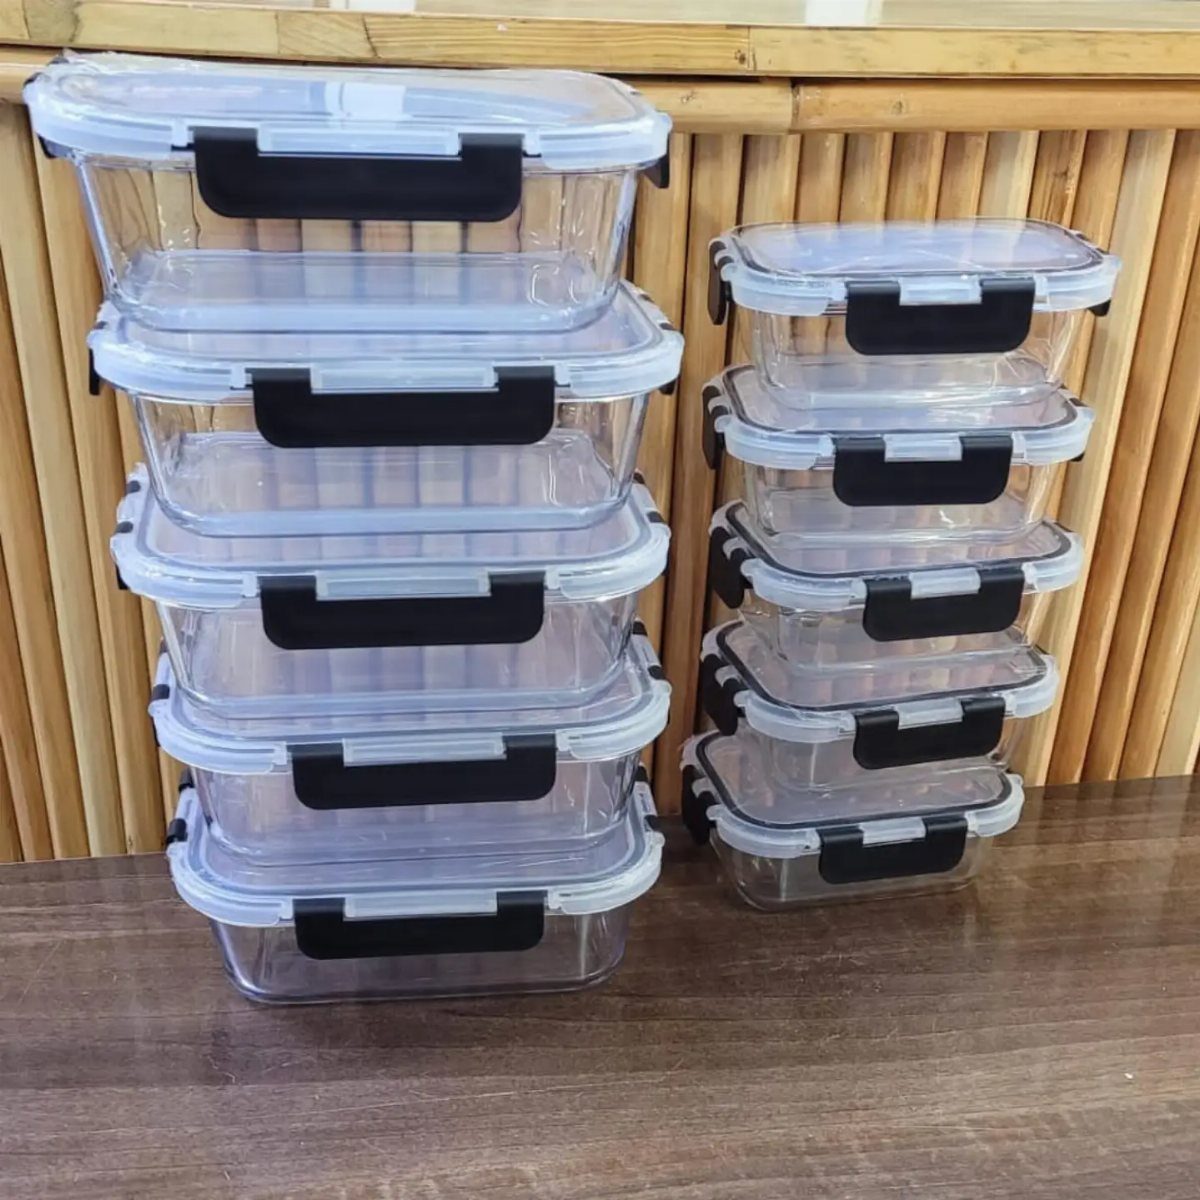
Airtight containers are what stand between your freezer food and the dry, papery burn that ruins taste and texture. Glass ones with black locking lids cost more upfront than disposable bags, but the seals stay firm year after year.
Freezer burn happens when air reaches the surface of food, so the barrier matters more than the material. Glass works; so does BPA-free plastic if it is rated freezer-safe and the lid locks down tight.
I look for stackable sets now because a freezer full of mismatched containers turns into a game of Tetris every time I need the bottom one.
Labels help, especially with homemade stock or sauce that freezes into identical-looking bricks. Write the contents and the date; even airtight seals cannot pause time.
4. Store Drinks on Top Shelf
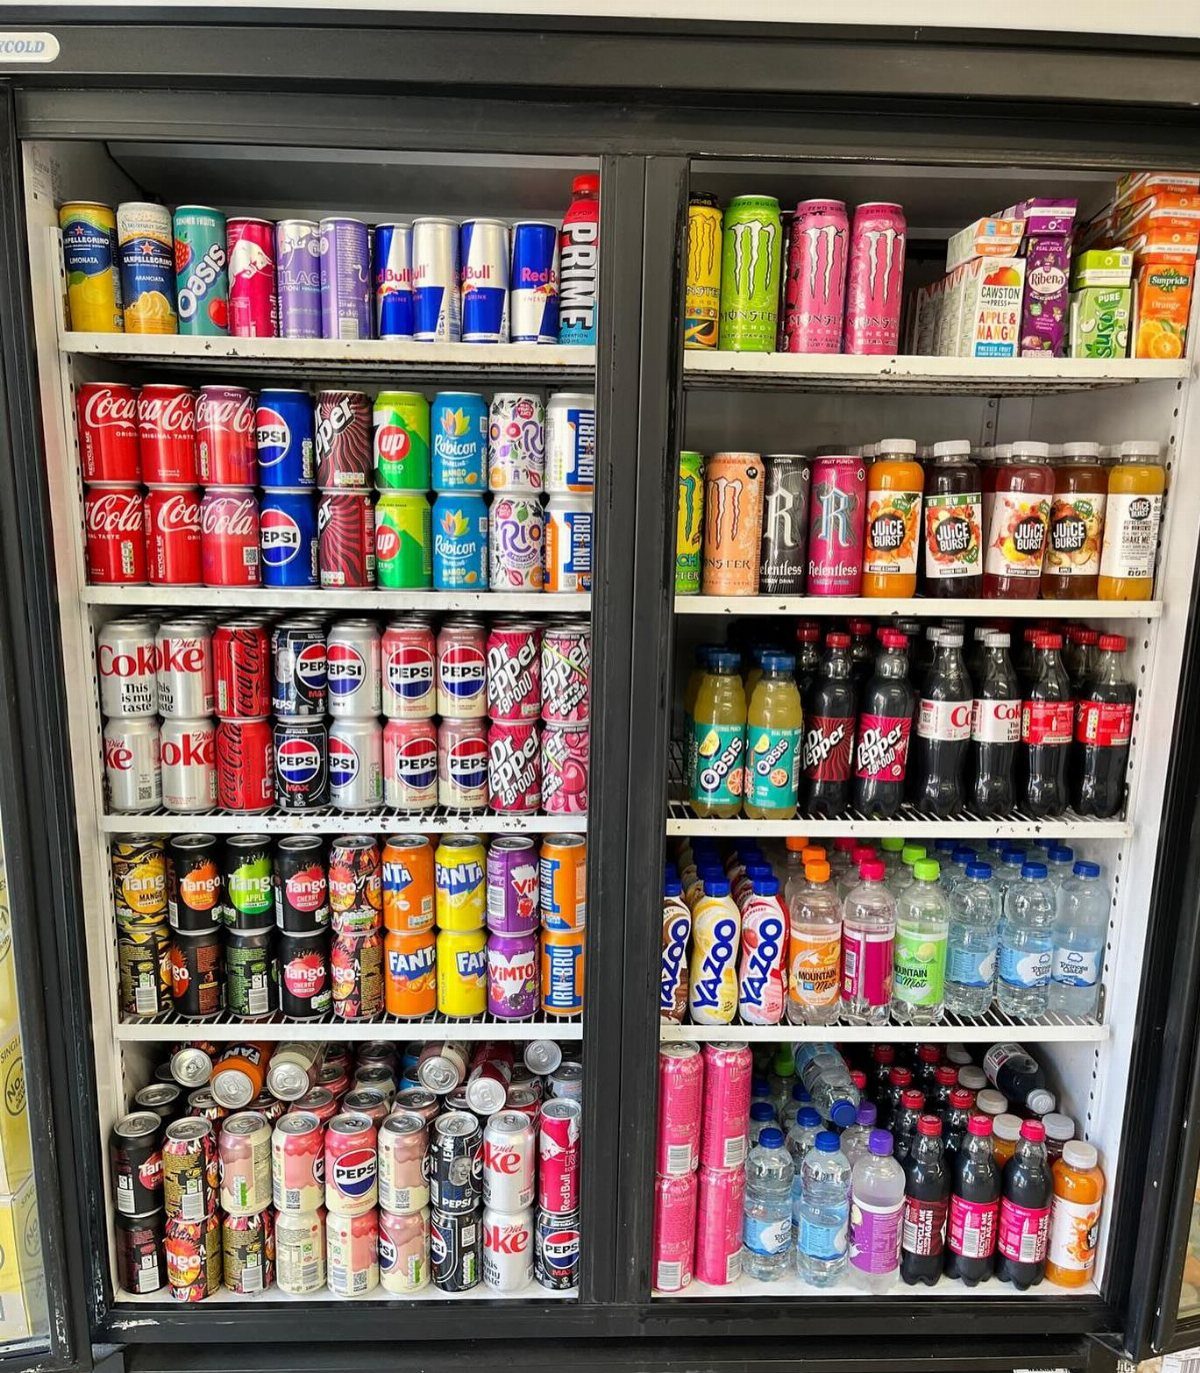
The top shelf of a refrigerator is the warmest spot, which makes it perfect for drinks and less perfect for anything that spoils fast.
Cans and bottles can handle the slight temperature bump, and keeping them up high means you are not bending and hunting every time someone wants a soda.
I also use that shelf for yogurt, sour cream, and eggs when the door bins are full. Reserve the middle and lower zones for the perishables that actually need the colder air down there.
In a busy household, the drink shelf empties fast and gets restocked fast, which is another reason to keep it visible and reachable.
Nothing blocks the light like a wall of beverage cans, so you can see at a glance when it is time to restock.
5. Label Everything
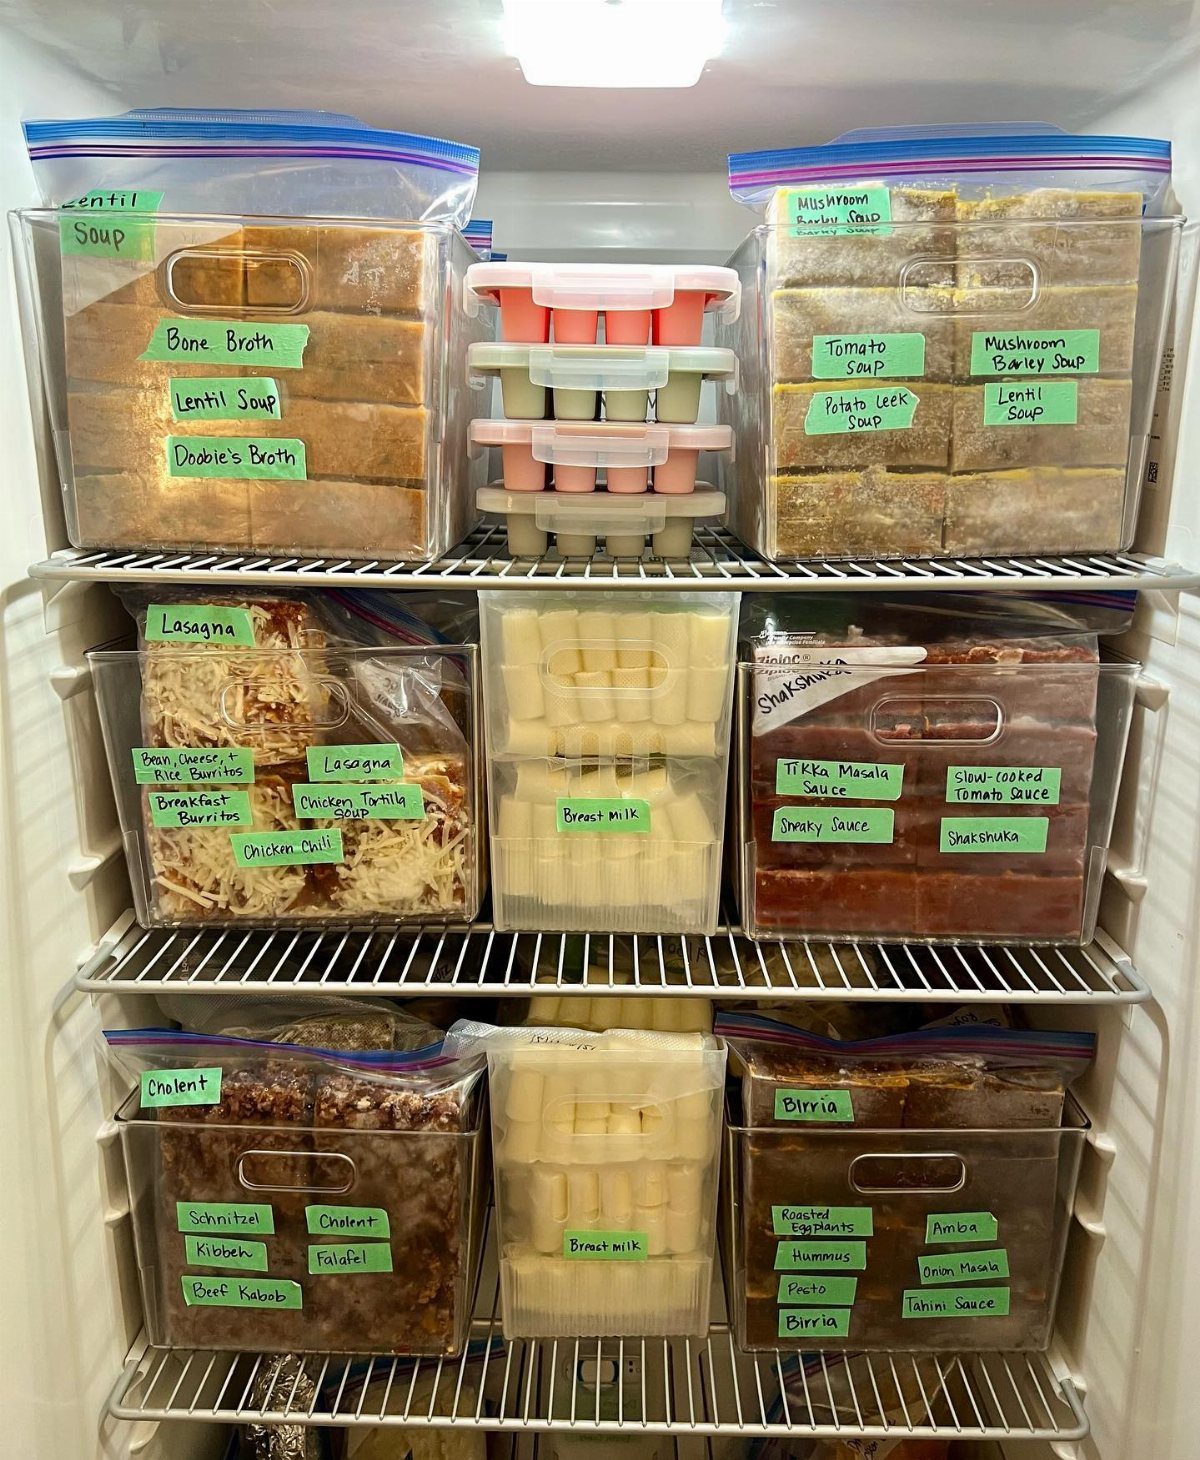
Labels are what keep an organization system alive after the first enthusiastic weekend. Without them, the bin marked "snacks" in your head becomes the bin where everything loose ends up by Wednesday.
Broad categories work better than narrow ones. "Veggies" covers more ground than "carrots," and your system does not collapse when you come home with zucchini instead.
I use masking tape and a Sharpie because it peels off clean when I change my mind, though any label that sticks in freezer air will do.
Masking tape on bins handles this well, and it peels off clean when the bin gets reused for something else.
Dated labels matter too, especially for leftovers; mystery containers without labels are not worth the risk, no matter how recently they went in.
6. Use Stackable Storage
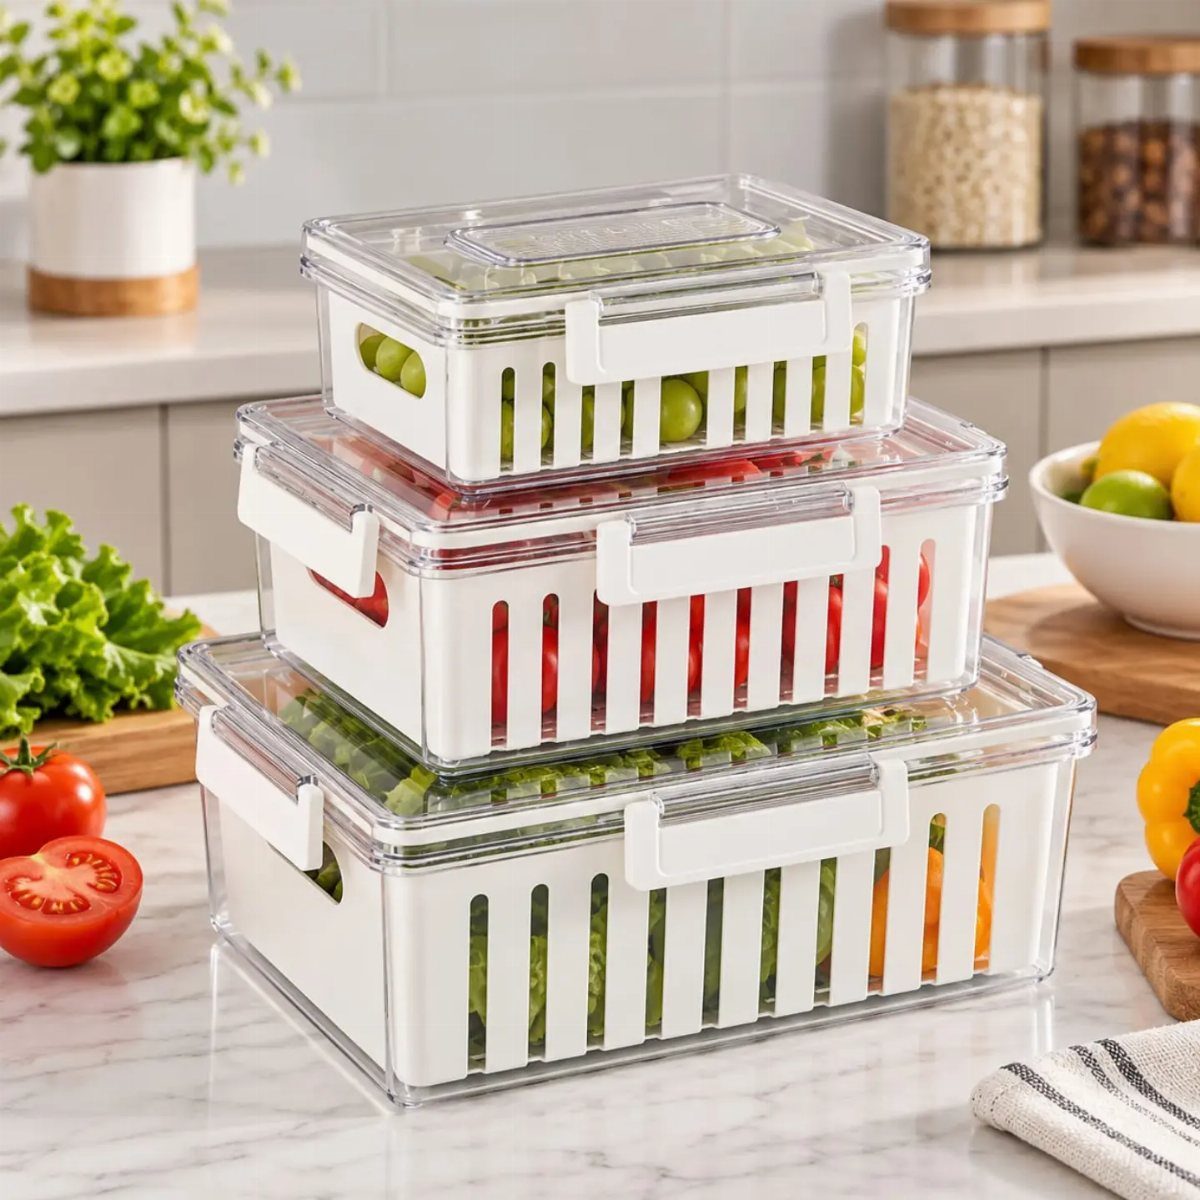
Stackable bins let you build upward instead of spreading outward, which matters when your American fridge freezer has deep shelves that otherwise turn into black holes.
The risk with stacking is needing the bottom bin and sending the whole tower sideways.
Marble countertops aside, these bins live just as well on wire freezer shelves. Measure your clearance first; a bin that fits the shelf width but not the height between levels buys you nothing but frustration.
7. Keep Produce Visible
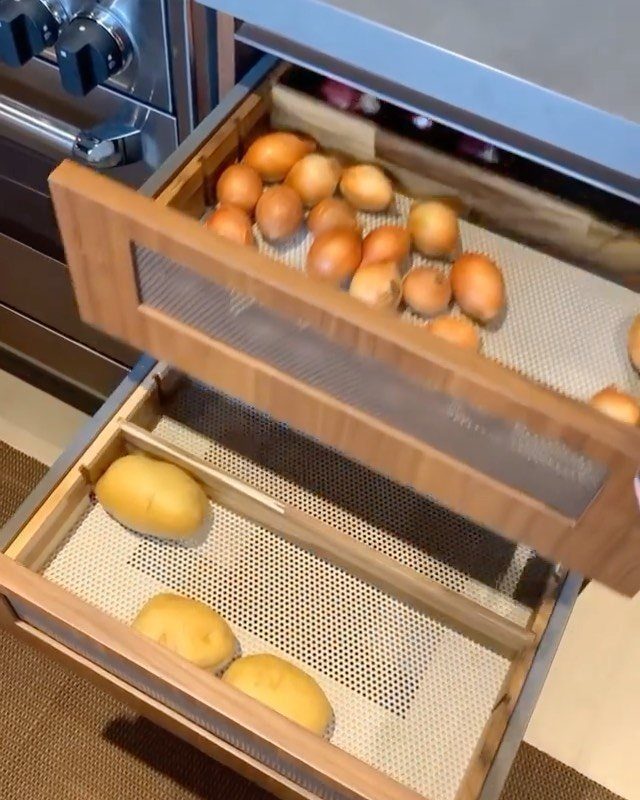
Mesh-bottomed wood drawers slide out from a cabinet and let potatoes breathe instead of sweating in a sealed bin. If you cannot see it, you will not use it before it turns.
Clear bins with vented sides, wire mesh or slatted wood, keep air moving so produce lasts longer than it would in a sealed tub. The drawer vents on most refrigerators help too.
Open the vent for low humidity and things that rot, apples and pears mostly; close it for greens that wilt, like spinach or arugula. Ethylene gas from the fruit needs somewhere to go.
An open shelf puts the carrots at eye level; a drawer buries them. Divided bins keep things separated without hiding them.
8. File Frozen Foods Vertically
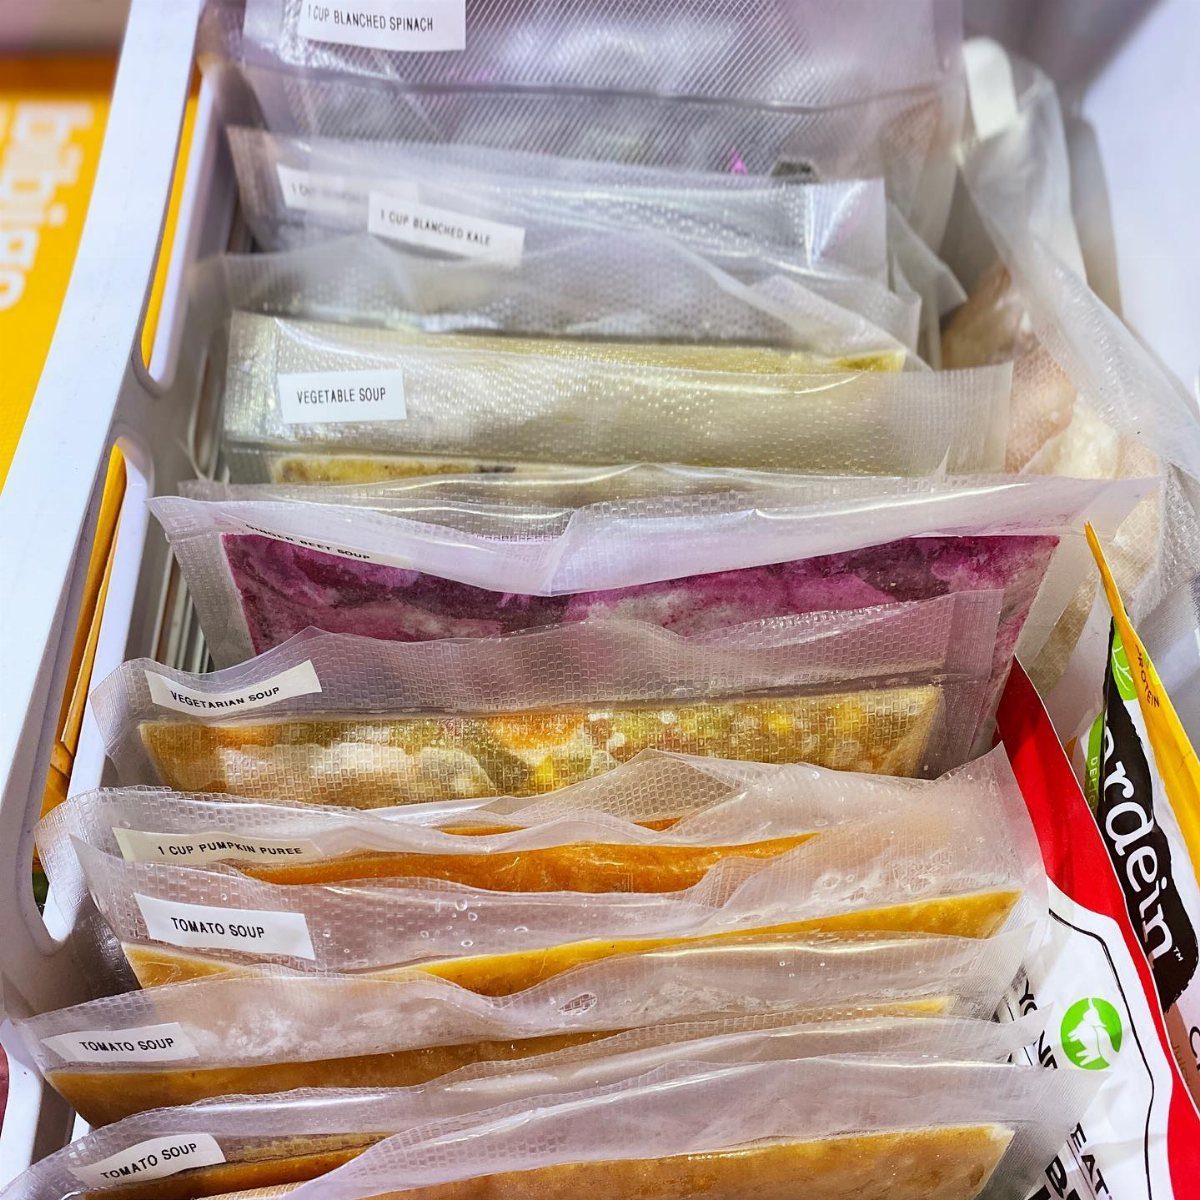
Clear freezer bags stand upright in a white drawer, labels facing out, spinach and kale and two kinds of soup easy to read at a glance.
That vertical filing is what keeps frozen meals from tumbling out like an avalanche every time you pull the handle.
A wire file sorter stands bags on end in an upright freezer, the kind with a single door. For a chest freezer, the same principle applies to the top pull-out drawer, or use divided bins stacked in layers.
Rotate stock the same way grocers do: newer bags drop underneath, older ones stay on top where your hand finds them first.
The maker of one setup keeps chicken backs in their own labeled section, stock-bound, which tells you this method holds up even for odd-shaped odds and ends.
9. Remove Bulky Packaging
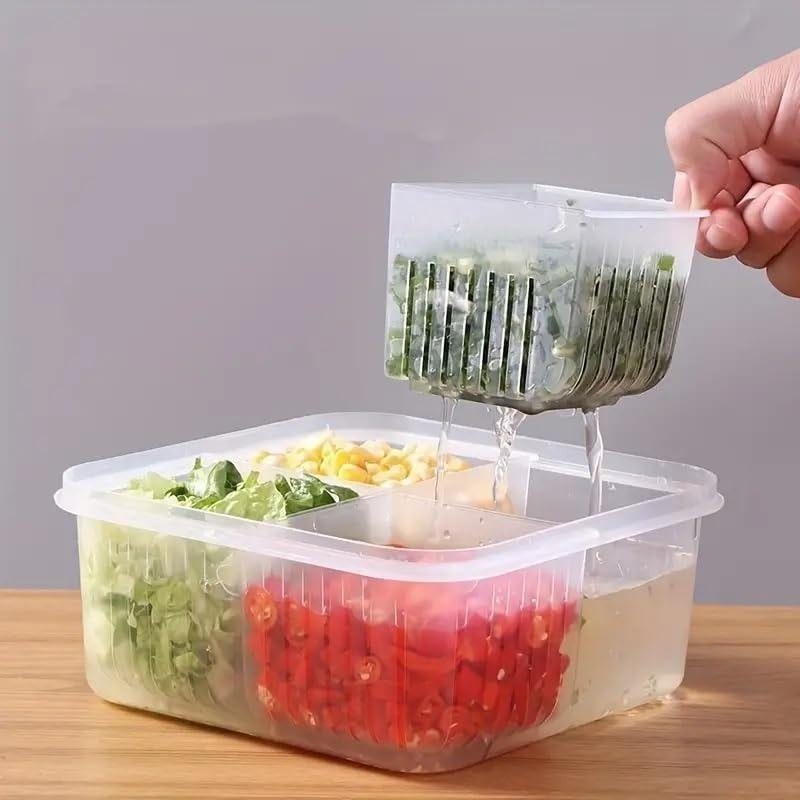
The original packaging is nowhere in sight.
Transferring food out of its bulk wrappings, yogurt multipacks or plastic-wrapped produce bundles, buys back shelf space you did not know you had. Clear sides let you see what is left before you open the lid.
Doing this right after a grocery run means you reach for ready-to-eat food instead of hunting through crumpled bags. You do need enough containers to hold what you buy regularly, which adds up if you are starting from nothing.
10. Use Bins for Freezer Organization
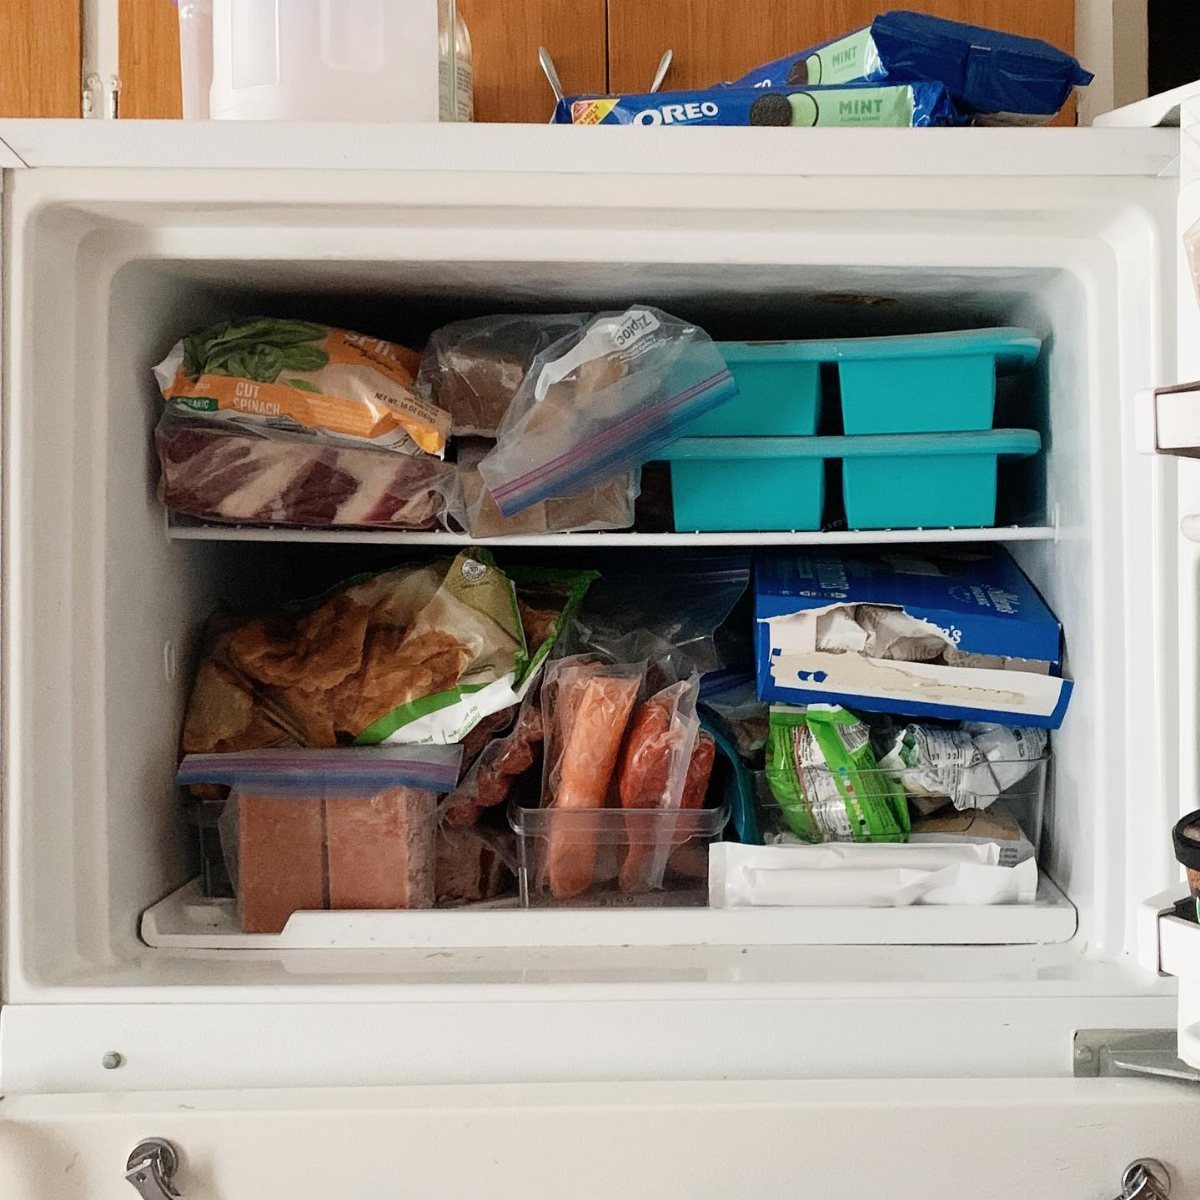
A small white freezer packs meat in plastic wrap, bags of vegetables, and blue plastic bins grouping like with like on every shelf. The bins are the organizing layer.
Label each bin, fish in one and meat in another and vegetables in a third, so you grab the right one without digging.
One person who reorganized their freezer this way had been tossing bags into open bins before, which worked until the bags piled up and buried the older stuff underneath. She switched to structured bins and stopped finding freezer-burnt surprises.
For a chest freezer, stack labeled baskets two deep and rotate, new purchases below, older items on top where you will use them first.
11. Deep Clean Regularly
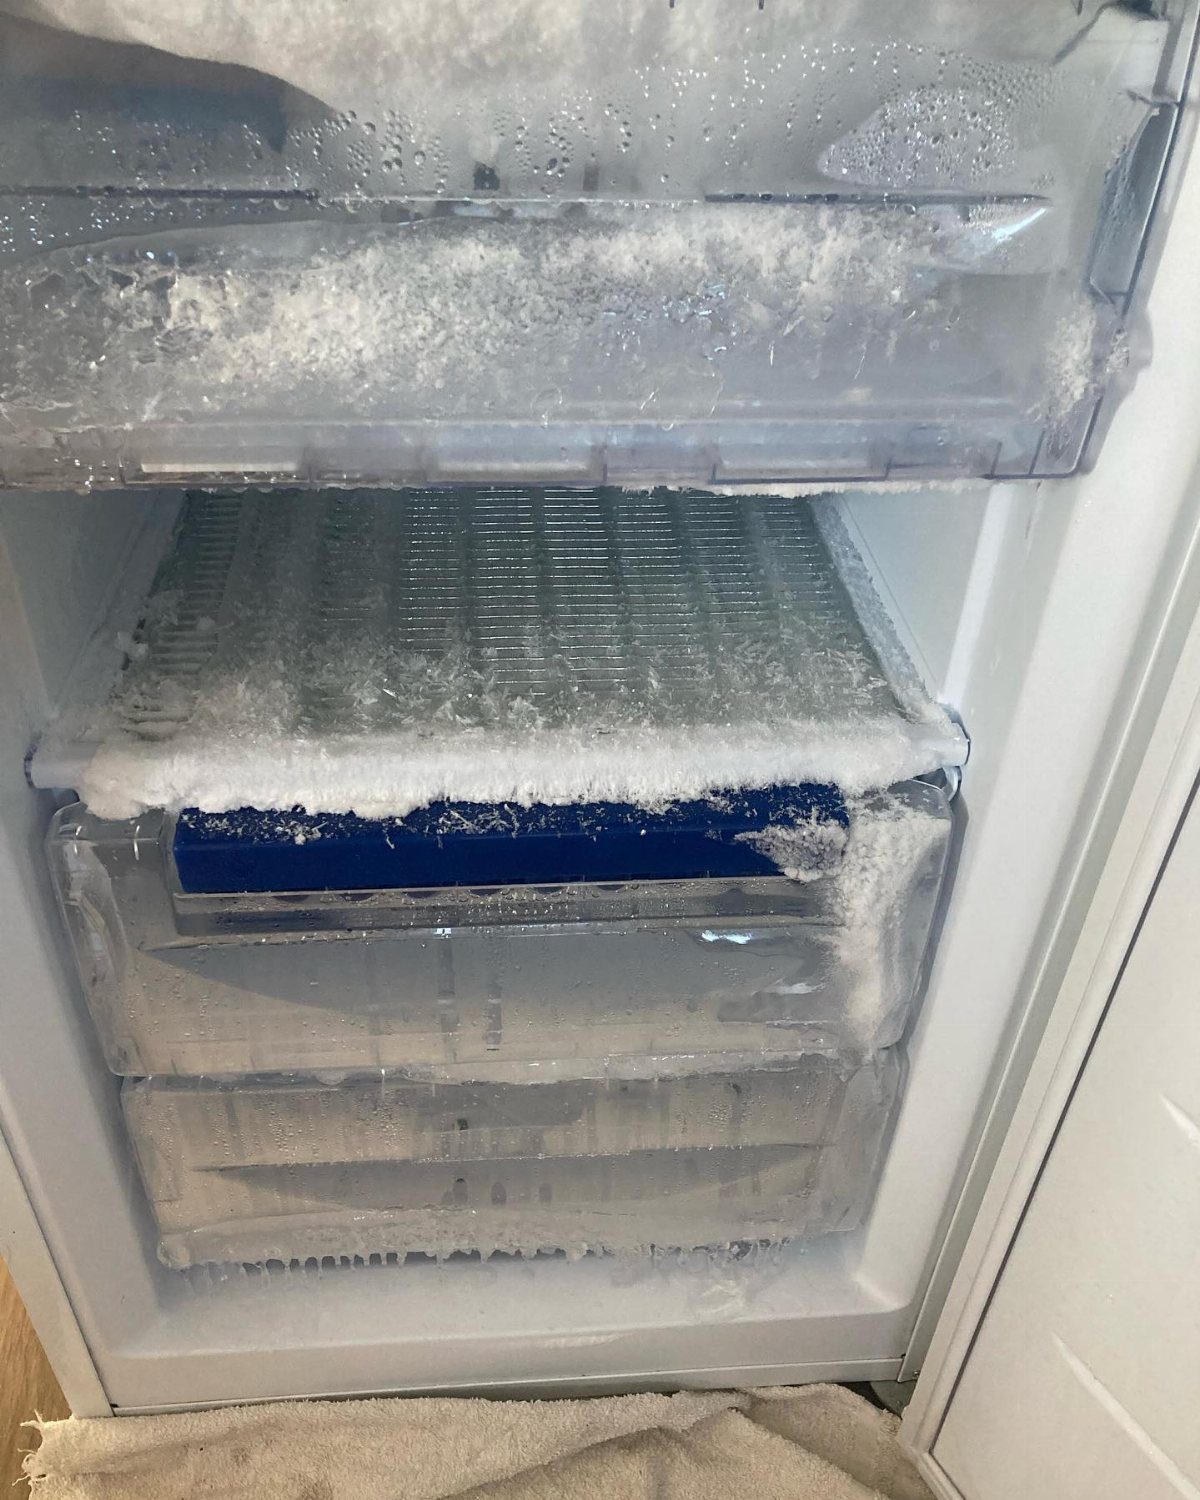
Defrosting before the frost gets heavy protects the seal and keeps the compressor from running overtime. That buildup is your reminder.
I deep clean my fridge and freezer twice a year at minimum, everything out, shelves and drawers scrubbed, door compartments not skipped.
Wipe spills when they happen, and run a cloth across jar bottoms before they go back on the shelf.
Once the surfaces are clean, sort what you took out; expired items go, nearly expired move to where you will see them.
A clean freezer runs quieter and draws less power. A bare fridge lets you put things back with intention, bins in the middle shelves for leftovers, taller items behind shorter ones where you can still see them.
12. Use a Salad Spinner for Greens
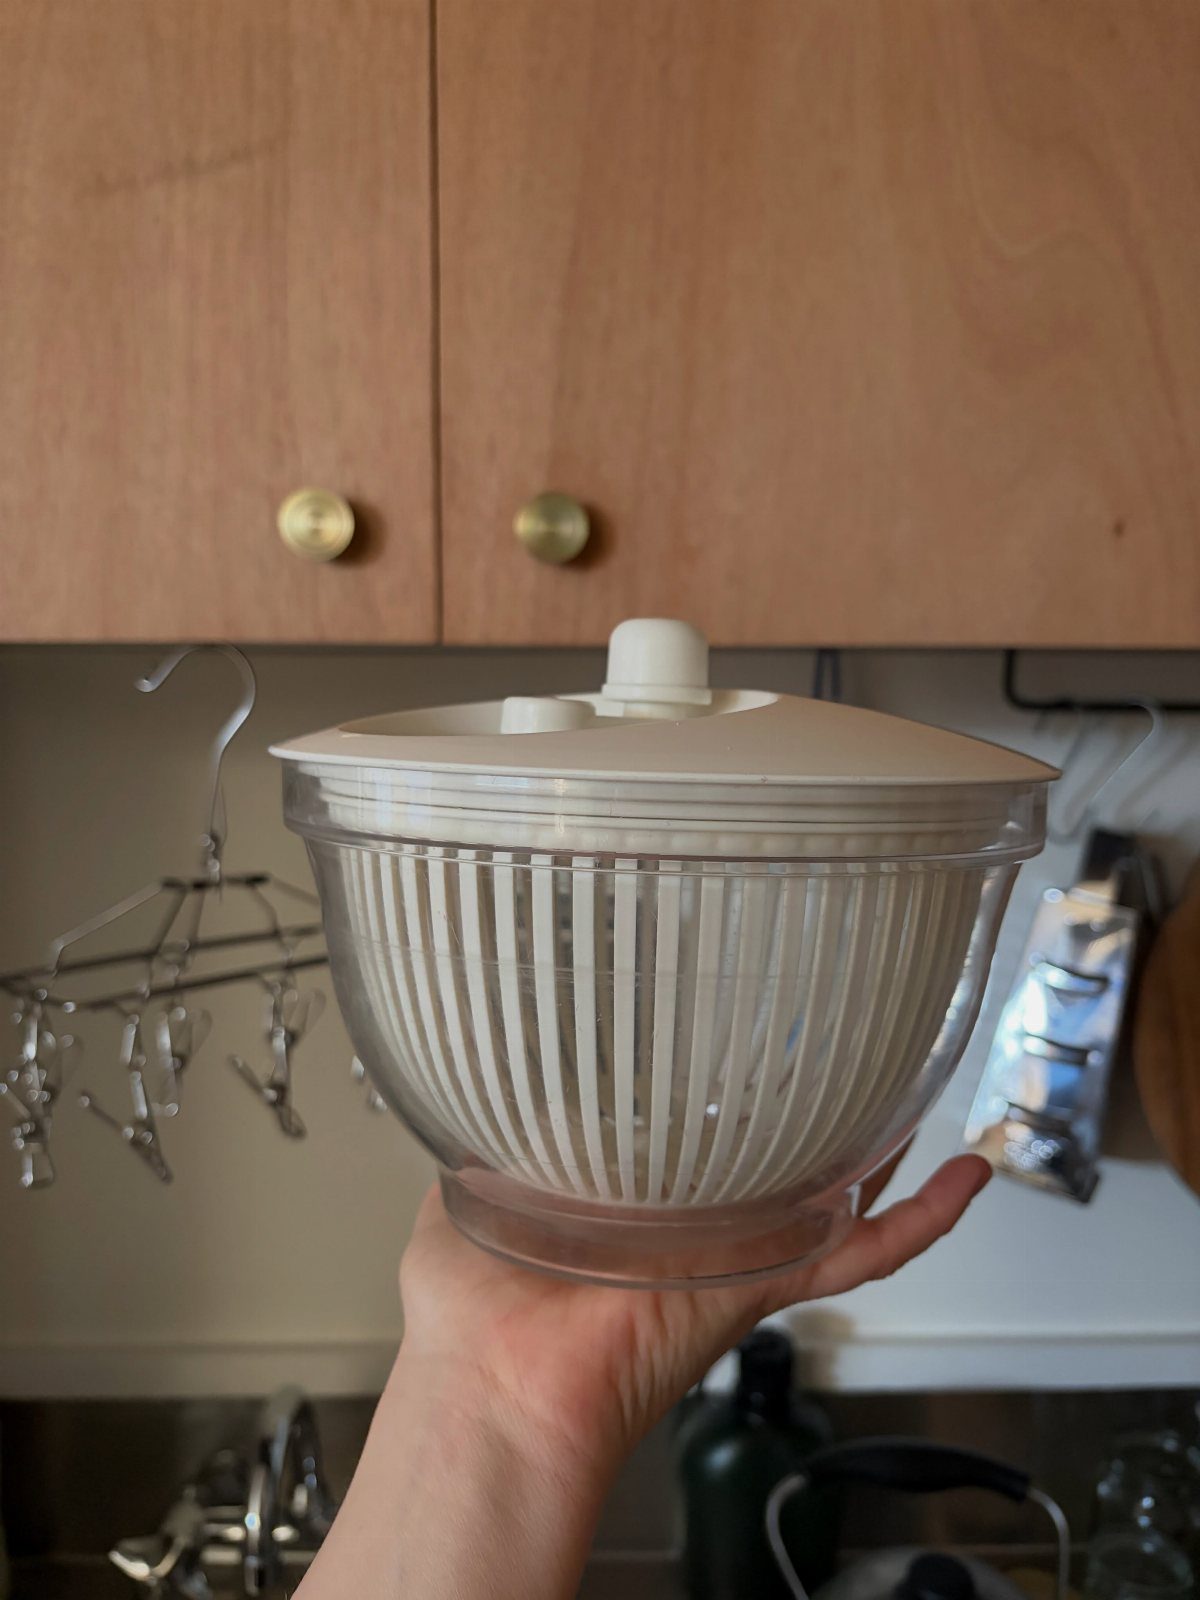
A salad spinner stores washed greens without the soggy rot that comes from a damp bag; the basket lifts out and the lid seals tight. That spinner is not just for washing.
Store washed, spun-dry lettuce right in the basket, lid on, and the greens stay crisp for days longer than they would in a produce bag or a sealed container where moisture collects.
The basket lifts out when you want a handful, goes back in when you are done, and the whole thing takes about as much shelf space as a medium storage container.
This suits anyone who buys greens with plans to eat them and watches them wilt instead. The limit is volume; a family salad for four might need two spinners, or one large one, to hold enough for the week.
Regular Maintenance Tips
Wiping down jars before they go back in keeps sticky rings from becoming permanent fixtures. A fridge and freezer both need a full deep clean twice a year, before the buildup gets stubborn.
The same schedule works for both because freezer spills and ice buildup need attention just as much as fridge drips do. In between those deep cleans, I check for expired items weekly.
Catching a yogurt before it turns or a sauce before it separates means I throw out less and have more room for what I actually use.
Food Safety Practices
Raw meat always goes on the bottom shelf, never above produce or leftovers. If juices leak, they hit an empty bin or a tray instead of everything below.
The door shelf is the warmest zone in any fridge, which is why dairy belongs on an interior shelf instead.
In the freezer, wire file sorters hold frozen meals upright so nothing tumbles out when I’m reaching for something behind it. Upright storage also means I can read labels without unstacking.
Meal Prep Benefits
Clear bins of pre-cut vegetables and cooked grains cut down on search time, so dinner actually happens. I prep snack packs on Sunday so weekday grabbing doesn’t default to whatever’s fastest.
Airtight containers keep cut produce crisp enough to last the week, and seeing them head-on in clear bins removes the friction of opening lid after lid.
The time I spend prepping once pays back in faster lunches and fewer impulse takeout orders.
Avoiding Food Waste
Every container that goes into my freezer gets a date, and meat bags get a name too. Without that, a frosted lump could be anything from any year, and I end up tossing rather than risk it.
I vacuum seal in portions, family size or single depending on what I’m storing, so I thaw only what I need. Foods I plan to keep long-term sit toward the back where the temperature stays most stable.
I use plastic bins to section the space, one slot for fruit, another for meat, another for ice cream, so nothing hides behind something else until it’s freezer-burned past saving.
For long-term freshness, use vacuum-sealed bags and clear containers to store food and organize your freezer. Label everything with dates, and organize the fridge by zones, placing raw meats on the bottom shelves and ready-to-eat foods on top.
Frequently Asked Questions
What is the best way to organize my fridge and freezer?
Think of your fridge in zones: the top shelf stays warmest, so drinks and less perishable items go there. The middle and lower shelves hold dairy, leftovers, and anything that spoils fast.
Raw meat belongs on the very bottom, with a tray underneath to catch leaks before they reach drawers below.
In the freezer, clear bins labeled by category keep bags from burying each other, and upright storage for frozen meals lets you read labels without unstacking.
What are some DIY freezer organizer ideas?
A wire file sorter, the kind meant for a desk drawer, will hold freezer bags on their sides with labels readable from the front.
For drawer freezers, measure depth, width, and height first, then choose stackable airtight containers that fit without wasting space.
In a chest freezer, shallow bins stacked in layers keep categories apart; I rotate stock so the oldest items sit on top where my hand lands first.