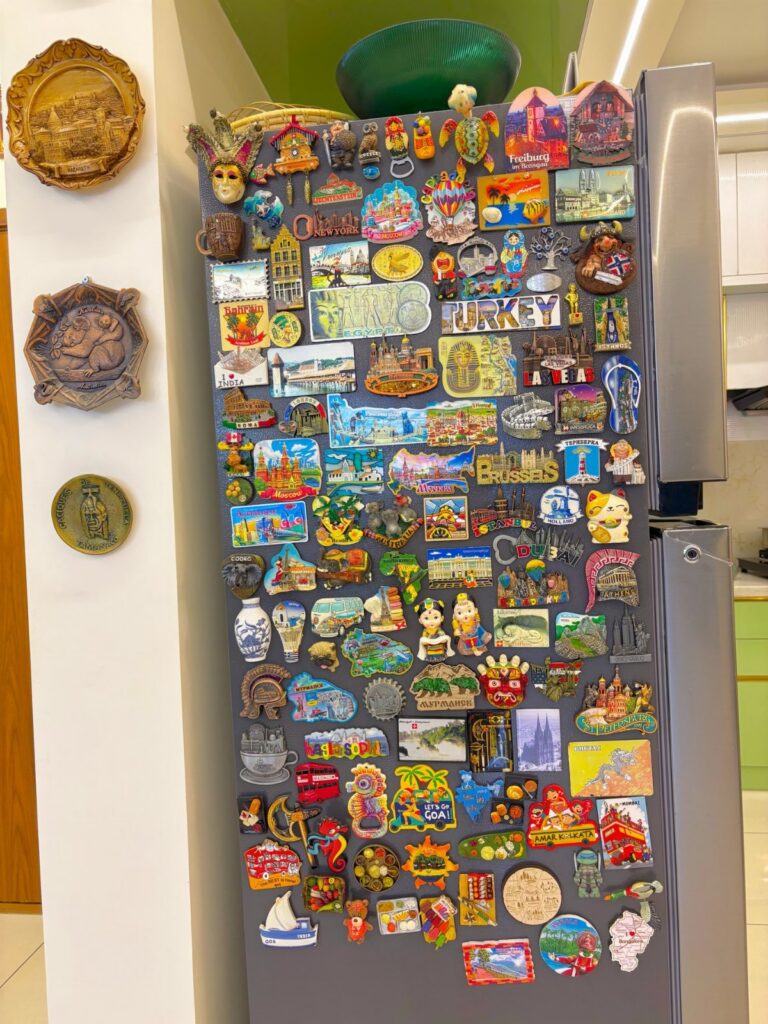
These refrigerator magnet ideas range from free scrap-bin builds to weekend projects that finish in a single afternoon. How much weight your magnet needs to hold decides which material and magnet strength make sense for you.
A palm-sized painted rock needs two 1-inch ceramic discs glued with E6000 and cured overnight, while a bottle cap with a magazine cutout inside gets by on hot glue and a half-inch ceramic magnet.
1. DIY Refrigerator Magnets
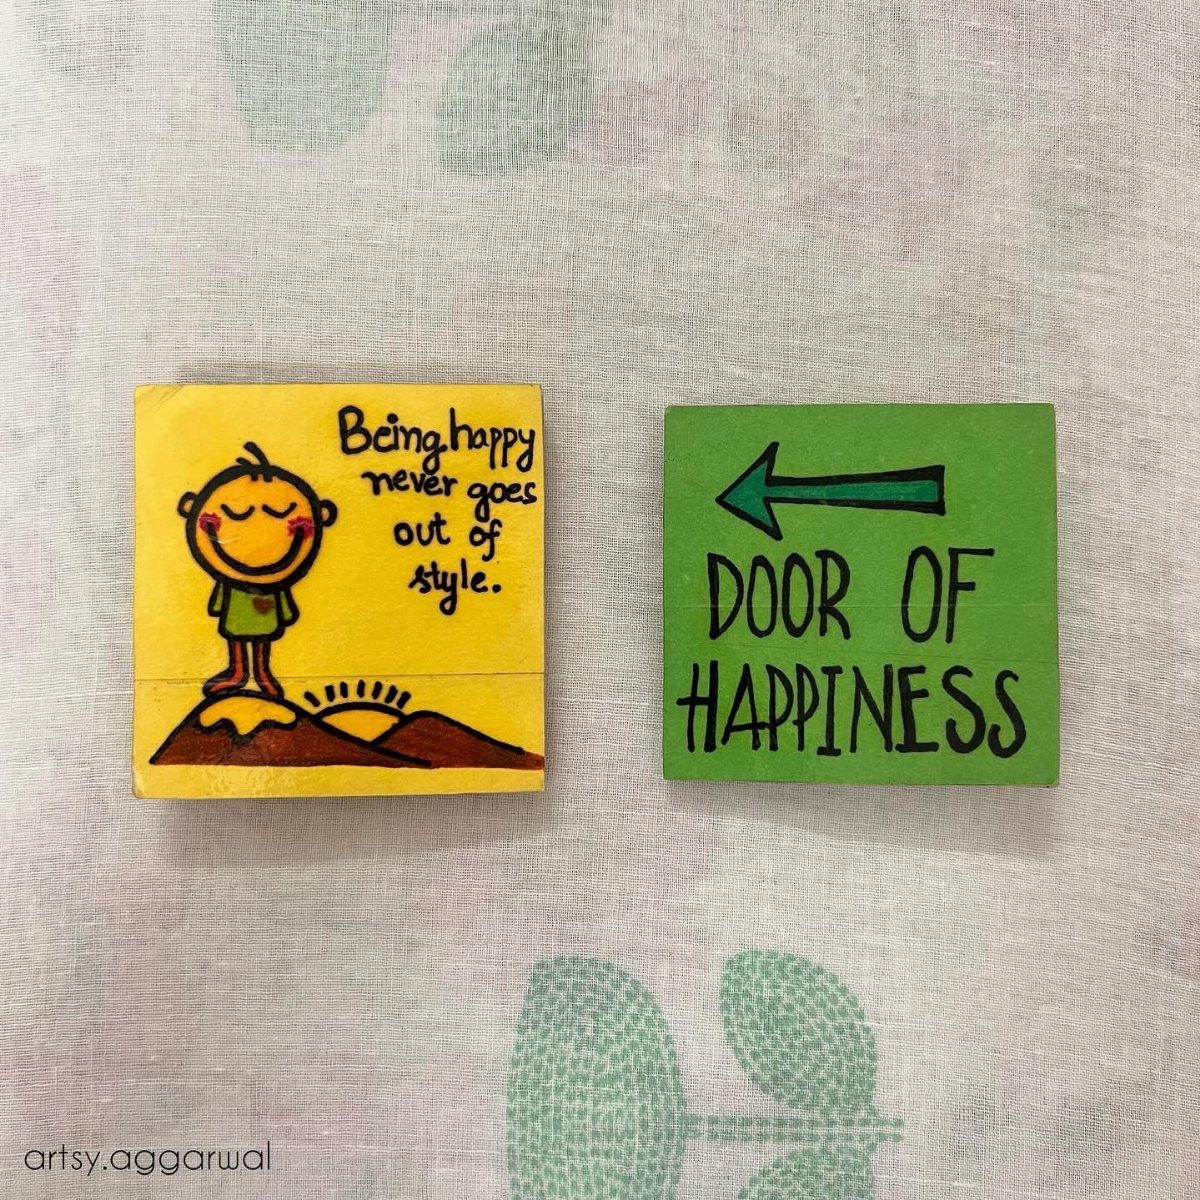
A wooden square and a painted phrase turn into something that holds up a grocery list or a kid’s drawing.
I like these because the base material costs almost nothing: small wood squares from the craft aisle, acrylic paint, and a strip magnet cut to size.
Strong craft glue matters more than the magnet’s shape; a thin neodymium strip holds heavier paper than the bulky roll stuff. A graphic shape or a short line of text both work for a quick custom magnet.
Either one takes one evening plus dry time. I’d keep the design simple; the small surface forgives mistakes but doesn’t reward clutter.
2. Bottle Cap Magnets
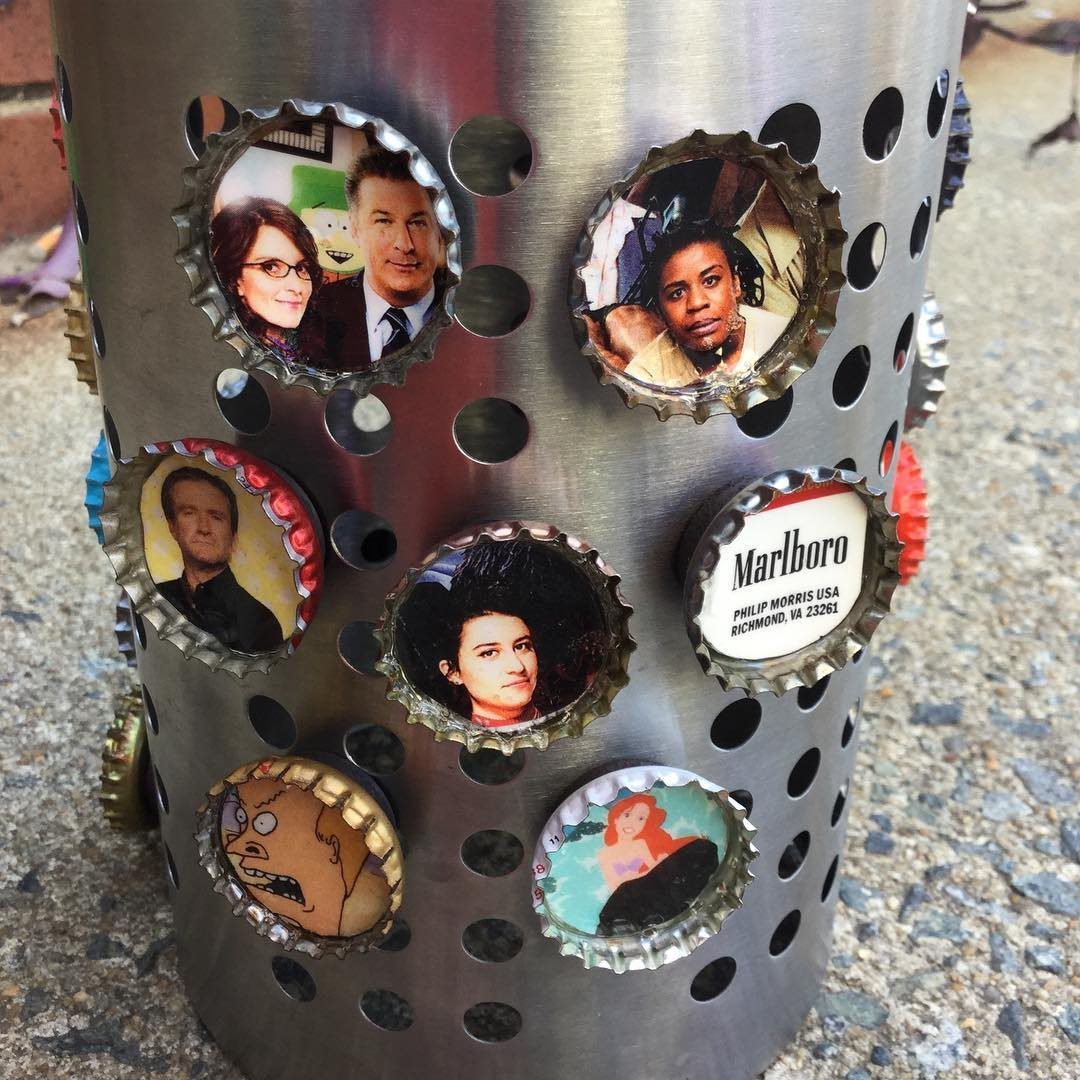
The metal rim of a bottle cap frames whatever you press inside like a tiny badge. I collect them for a few weeks, wash with soap and water, then dry thoroughly or the glue fails later.
Paint the inside or drop in a one-inch circle cut from magazine paper, a photo, or printed text. The food-shaped versions need polymer clay or thick paint built up in layers.
A half-inch ceramic magnet hot-glued to the back works for lightweight paper; upgrade to a neodymium disc if you want it to hold a takeout menu.
Kids can manage the painting and gluing, though an adult should handle the magnet attachment.
3. Air Dry Clay Magnets
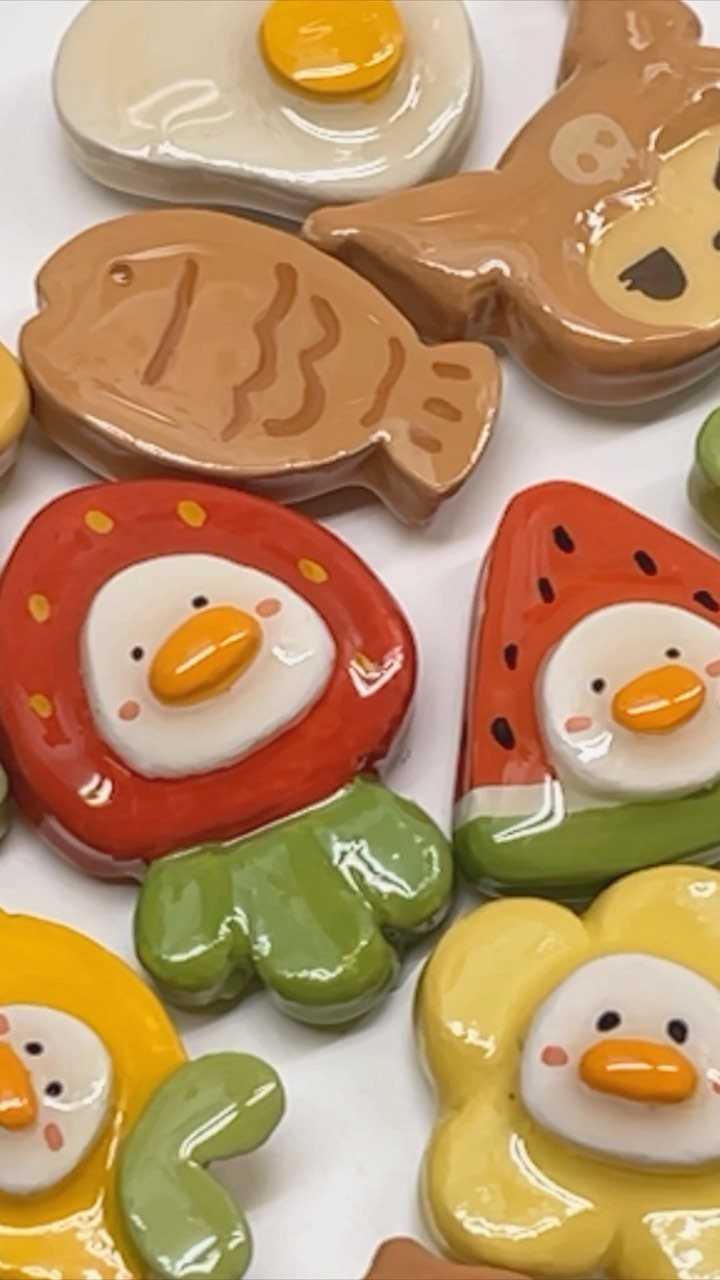
Air-dry clay lets you build a small animal or a letter without firing anything in an oven. Glossy finish brings out the color on small shapes like fruit or animals.
That shine comes from acrylic varnish or resin after painting, not from the clay itself, which dries to a matte, slightly chalky finish.
I roll pieces thin so they dry evenly all the way through; thick spots stay soft inside and crack later. A pin or toothpick hole in the back, filled with glue, gives the magnet more grip than a flat surface.
This one suits an afternoon with kids old enough to pinch and shape without eating the material.
4. Miniature Map Magnets
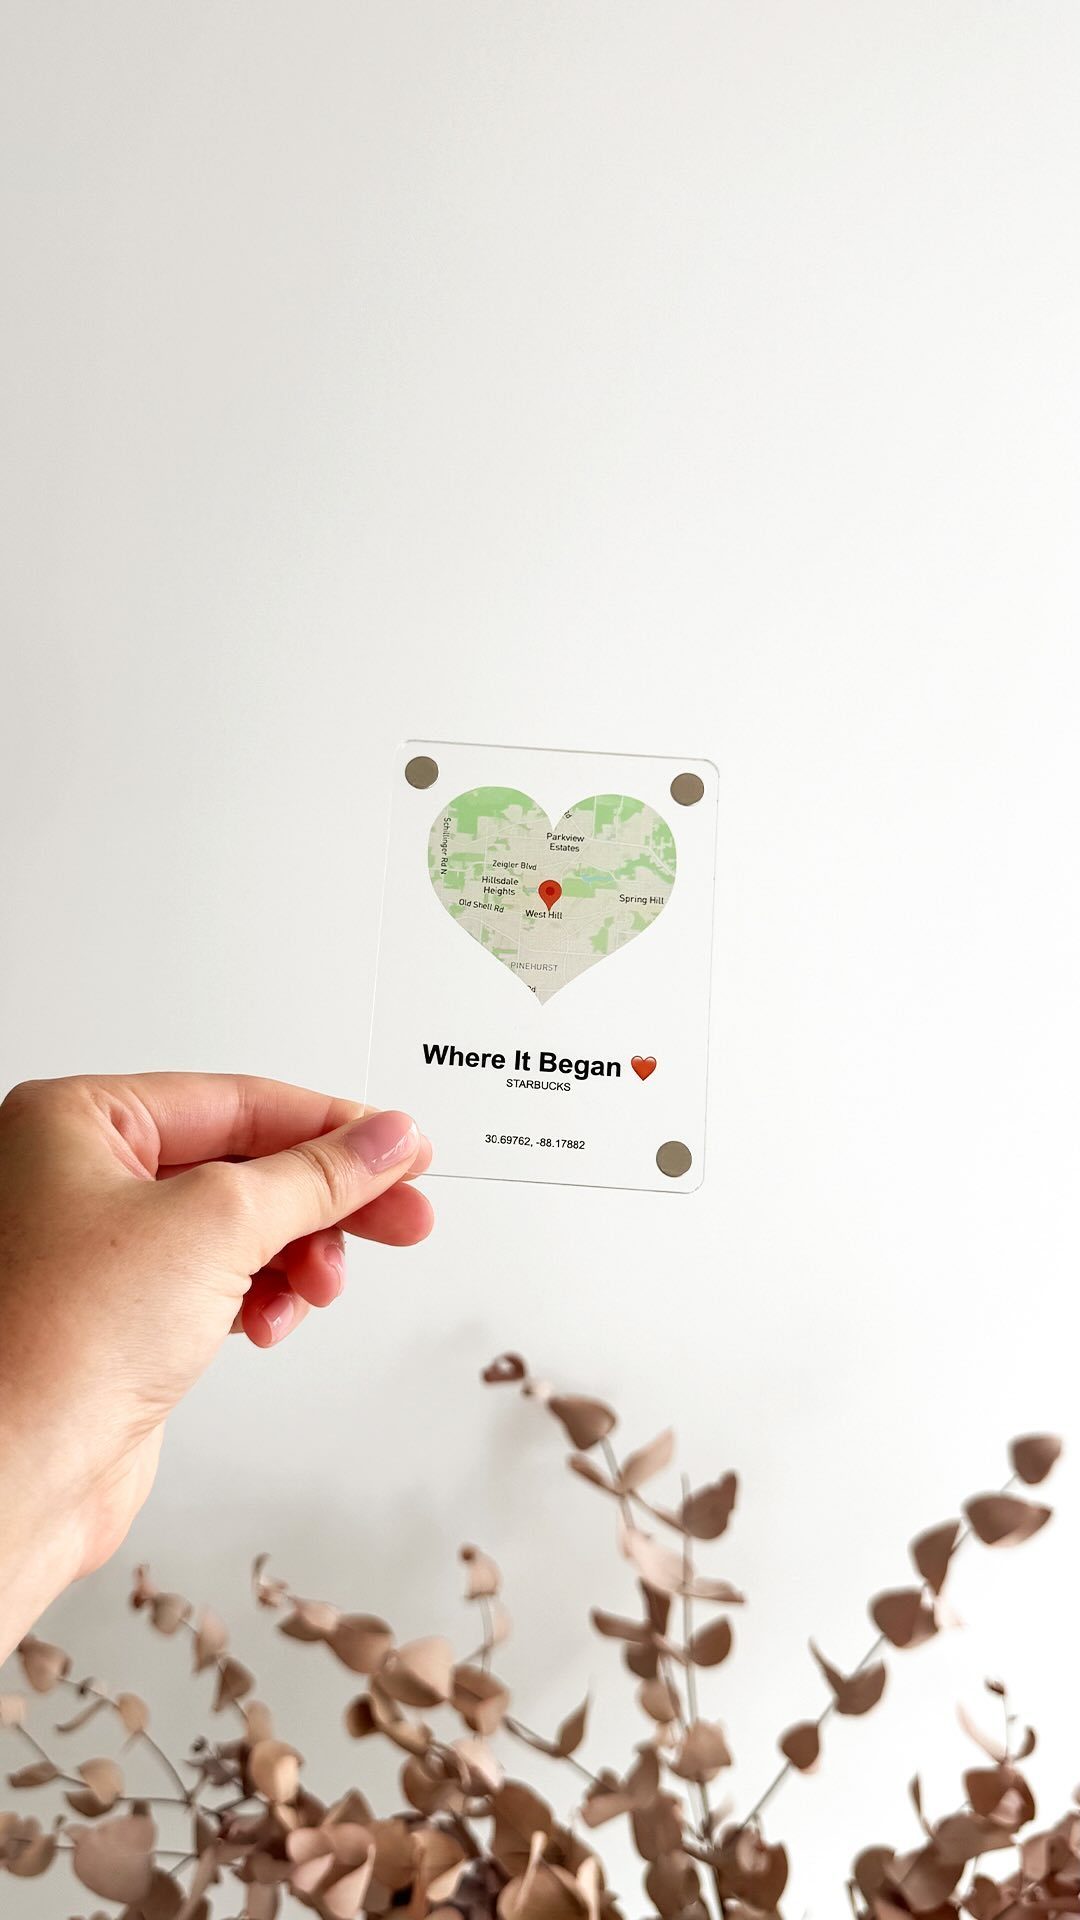
A heart cut from a road map turns a trip into something you pass every morning. I’d skip the backing card and seal the paper directly with matte Mod Podge so it lies flatter against the fridge.
A one-inch craft frame, the kind sold for miniature painting, finishes the edge and hides ragged scissors work.
5. Air-Dry Clay Citrus Magnets
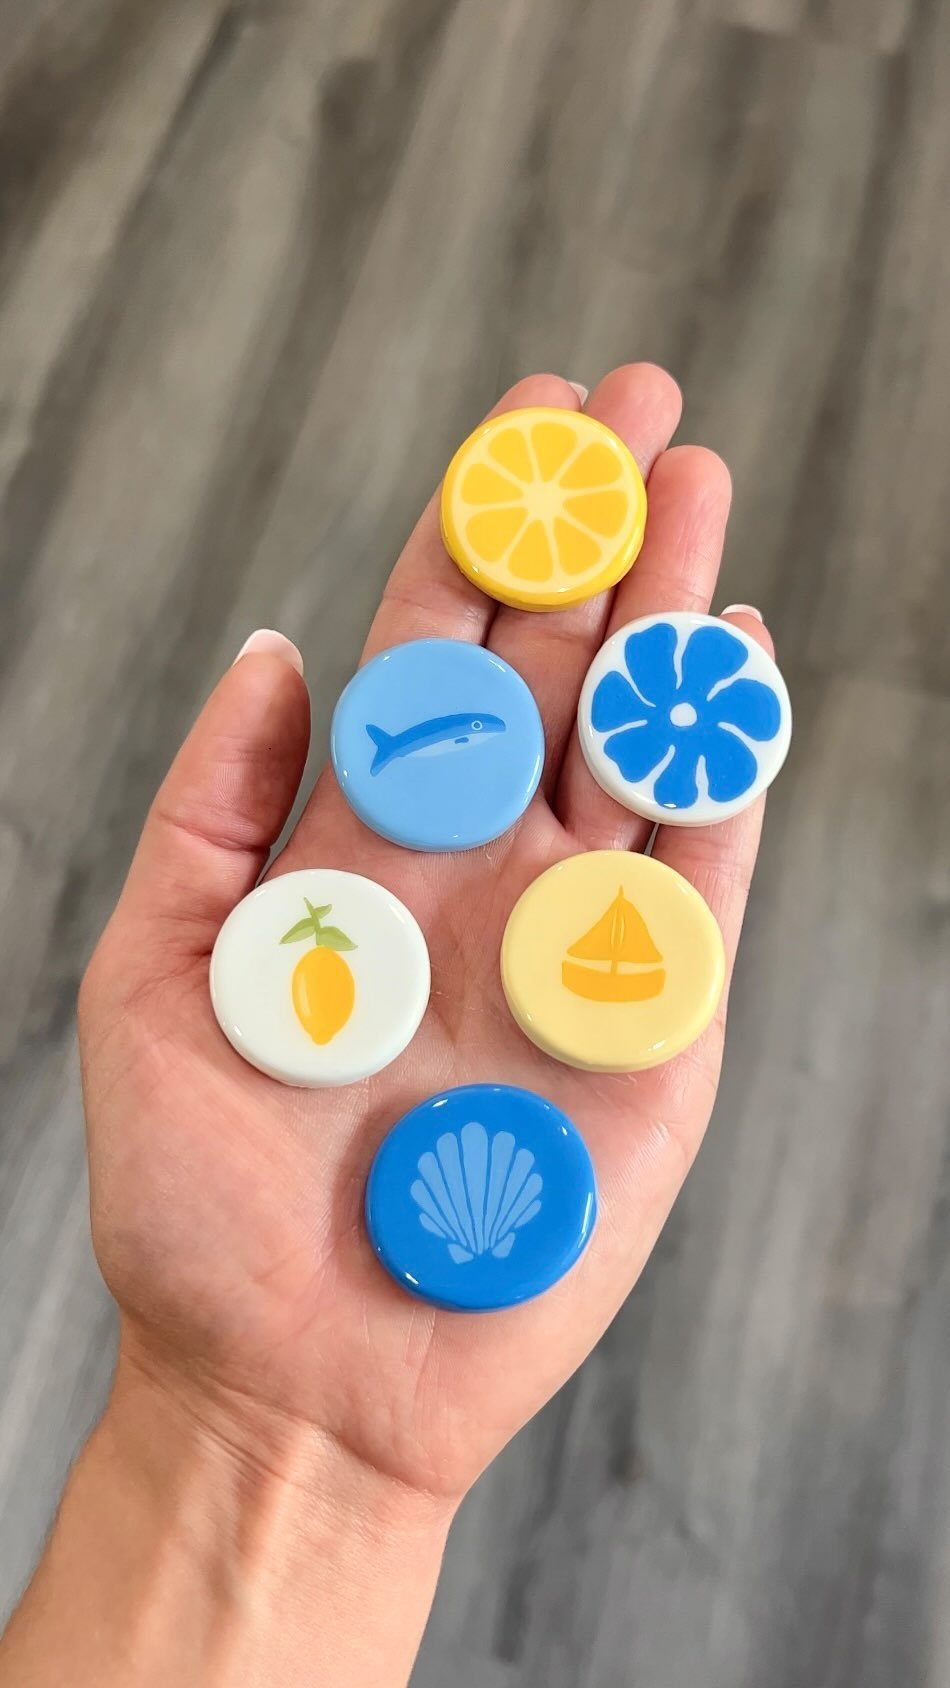
The shapes are simple: a lemon is a yellow circle with white pith and eight pale segments. A toothpick scores the lines while the clay is still soft.
A whole lemon, a slice, and a peach make a start; I’d add a lime and a blood orange for a fuller set.
Dry time runs about a day, paint goes on in two thin coats, and a coat of clear nail polish gives the gloss you see.
Start with the lemon slice; if the segments look wrong, roll it back into a ball and try again.
6. Kids’ Art Glass Tile Magnets

A glass tile pressed over a drawing flattens crayon wax into something that looks almost like stained glass. Square glass tiles turn any small drawing into a magnet that holds up to daily use.
The tiles are one-inch glass or acrylic, the kind sold for pendant making; flat-back glass gems from the floral aisle work too and cost less, though the dome distorts the image slightly.
I trace the tile shape on the drawing, cut inside the line so no white paper shows, then glue with clear-drying craft adhesive. A second magnet on the back, not just a dot, keeps the weight from sliding.
This one solves the pile of preschool art without keeping the pile.
7. Fingerprint Art Magnets
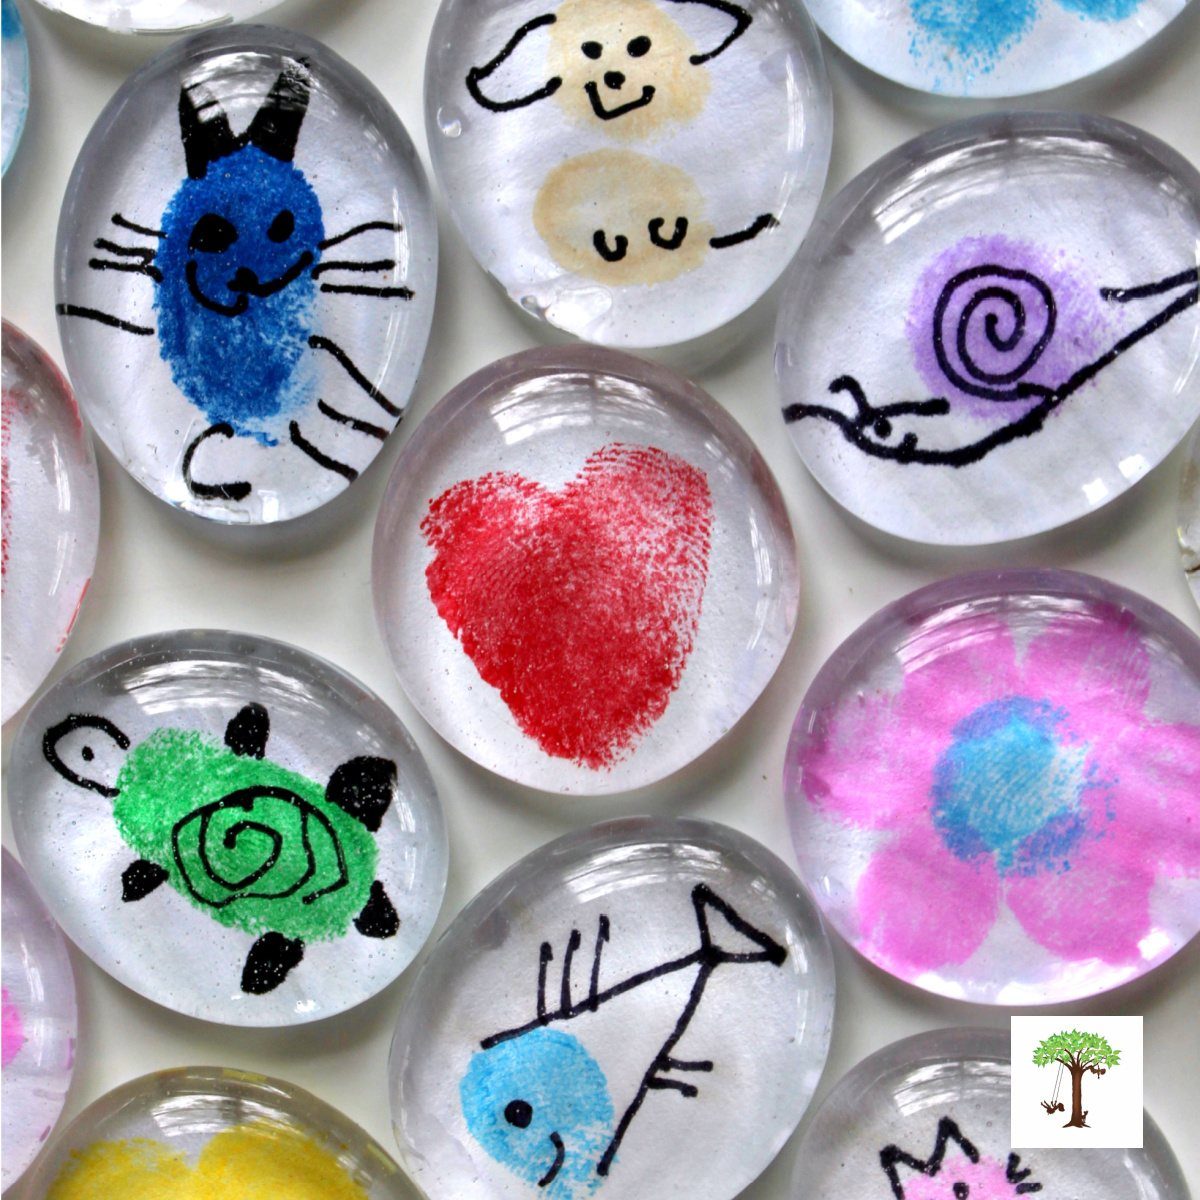
Small fingers press into ink pads and leave behind cats, hearts, turtles, snails. The prints get sealed under clear glass pebbles with a magnet glued to the back.
This one works for any age that can hold still long enough to press a thumb down.
The glass rounds come cheap in bags from craft stores, and one afternoon of printing fills a whole gift set for grandparents or teachers.
My tip: label the back with the year and the kid’s age while the Mod Podge dries. You will not remember whose tiny thumb made which turtle.
8. DIY Ransom Note Magnets
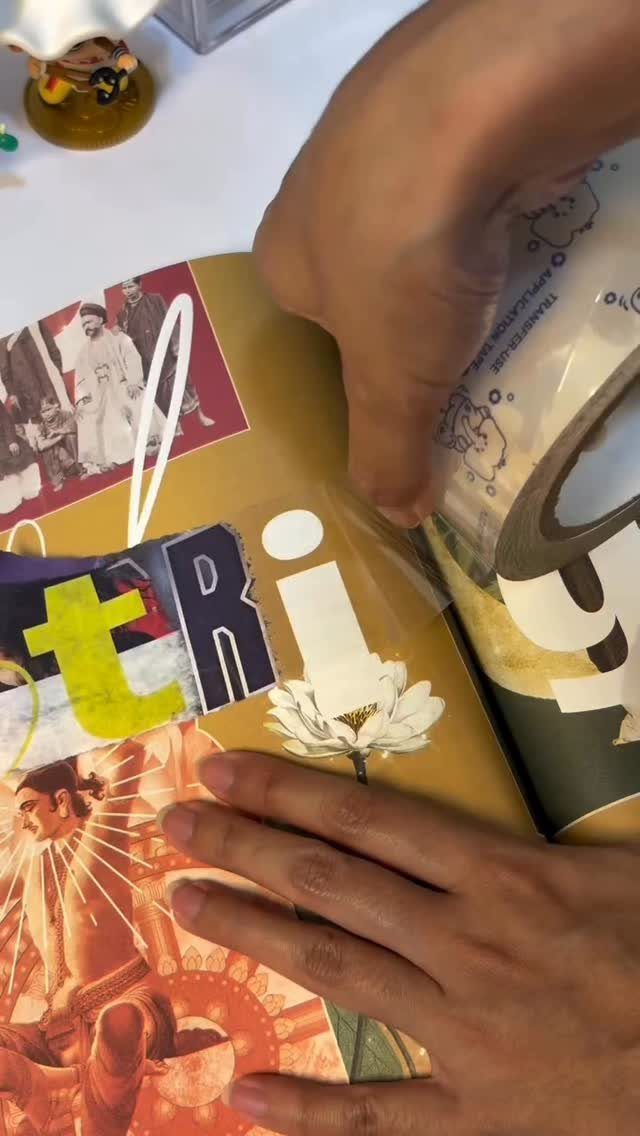
Magazine pages, scissors, and a glue stick turn into the most dramatic grocery list holder your fridge has ever held. Cut letters ransom-note style from old glossies and mount them onto small wooden blocks with Mod Podge.
The blocks give weight and a clean edge that paper alone lacks. I like using food magazines for the color range; fashion pages run too pink.
These suit anyone who leaves sarcastic notes for housemates. The downside is legibility: your "buy milk" message reads like a threat, which is either the point or a reason to skip this one.
9. Ice Cream Stick Magnets
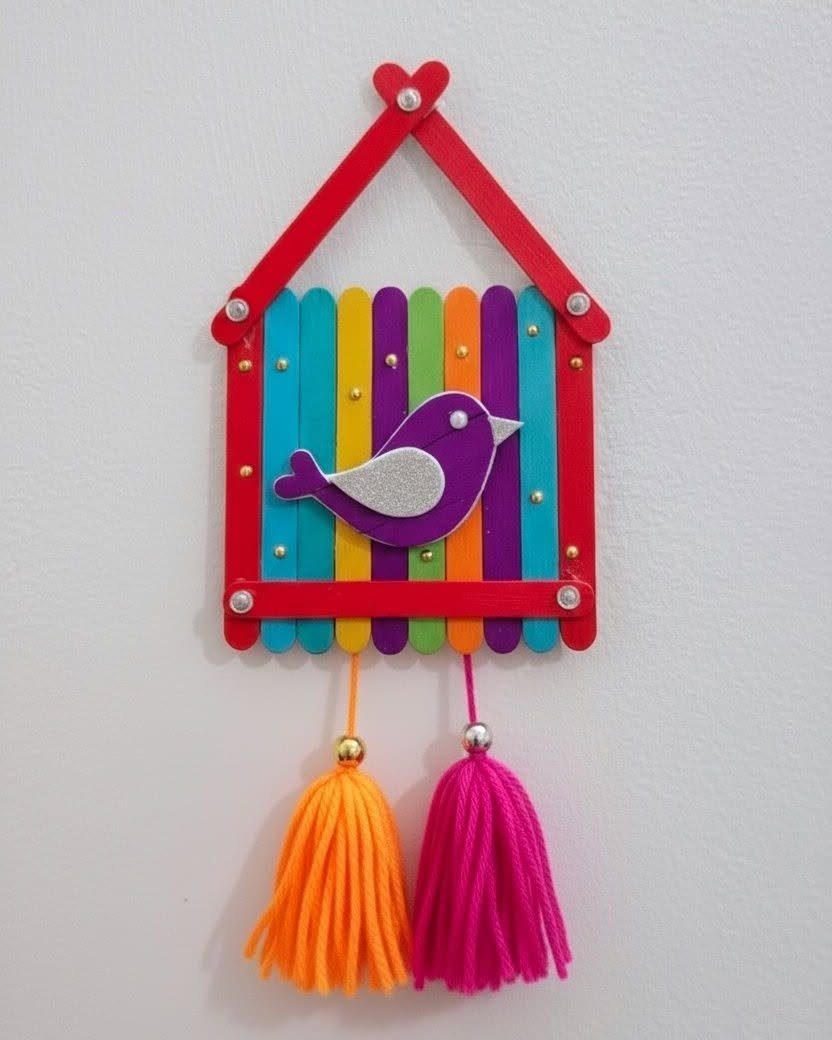
Four popsicle sticks and glue make a frame that actually fits school photos. Paint the sticks, wrap them with yarn, glue on a paper bird or a sequin, and press a magnet strip across the back.
The opening wants measuring against your actual prints, not the 4-by-6 you wish it were. Kids decorate fast and lose interest; the assembly line approach works better than treating each like a masterpiece.
Save the fancy embellishments for the top half. The bottom hangs too close to countertop spills.
10. DIY Painted Rock Magnets
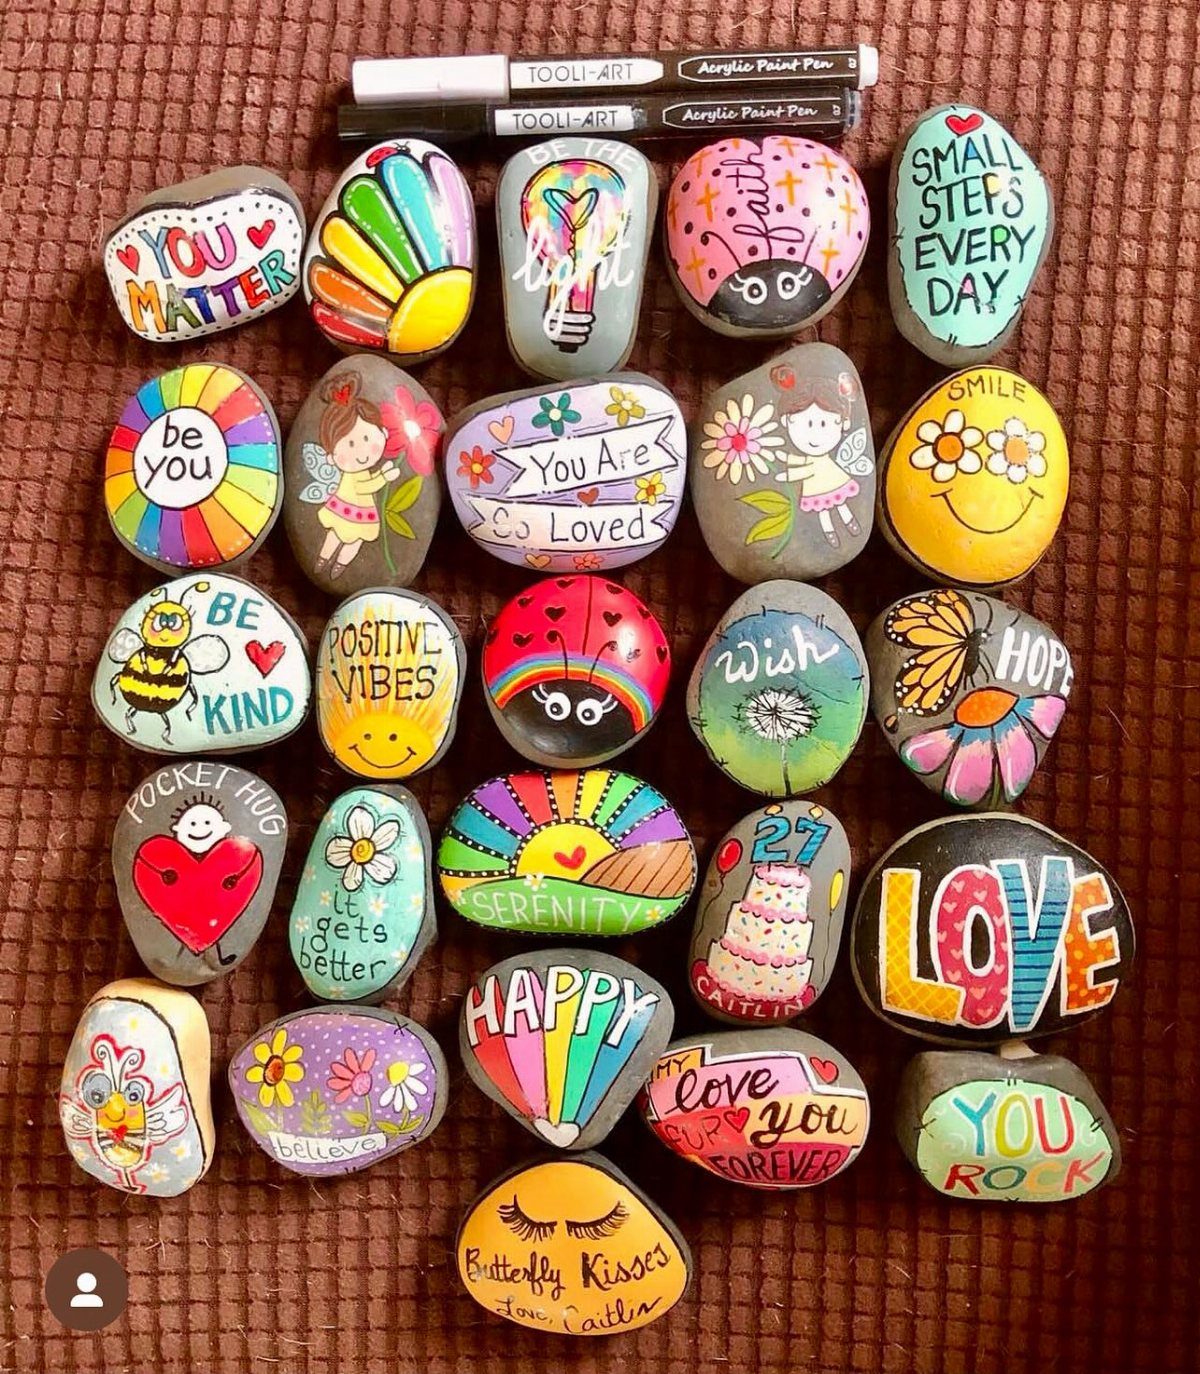
Smooth river stones take acrylic paint and turn into words or patterns that hold against the fridge door.
Sealing matters. Unsealed paint flakes off when stones knock together.
A quick spray acrylic coat after the design dries adds months of life.
Weight is the limit here. A palm-sized stone needs a strong magnet; the thin adhesive dots fail inside a week.
I use two 1-inch ceramic discs per stone, glued with E6000, cured overnight.
11. DIY Tetris Magnets
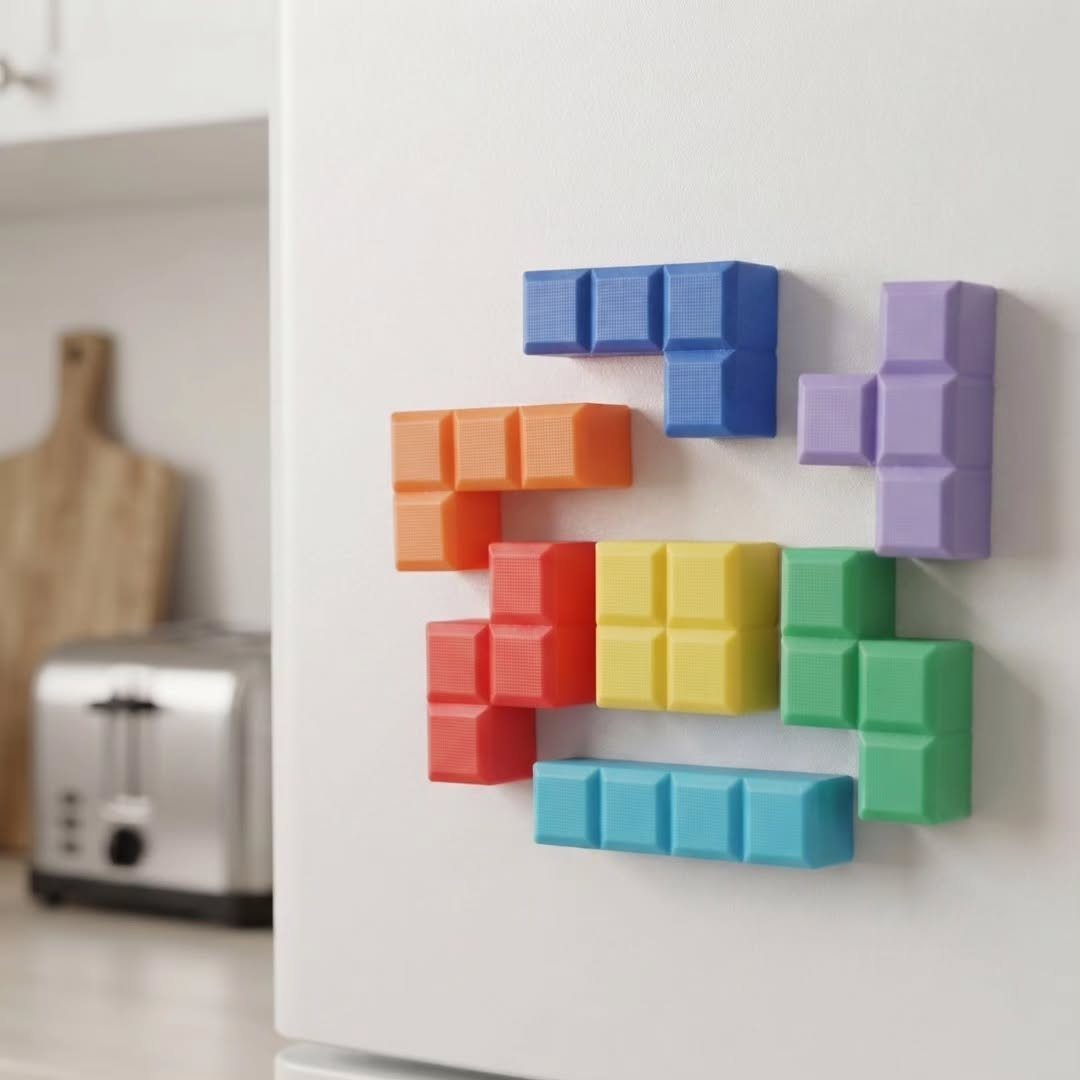
Colored wooden beads string together into the block shapes from the old game: the long bar, the square, the L and its mirror, the T, the squiggle.
Glue the beads at their contact points and mount the shape on a magnet back.
The color matching is what sells it. The cyan, the purple, the orange: get close enough and anyone who played in the nineties recognizes them instantly.
A bag of mixed wooden beads is cheap and covers two full sets. Stringing order matters; lay the shape flat before the glue sets, or your L-block torques into something unrecognizable.
These want a strong fridge surface; weak magnets slide under the bead weight.
12. DIY Glitter Magnets
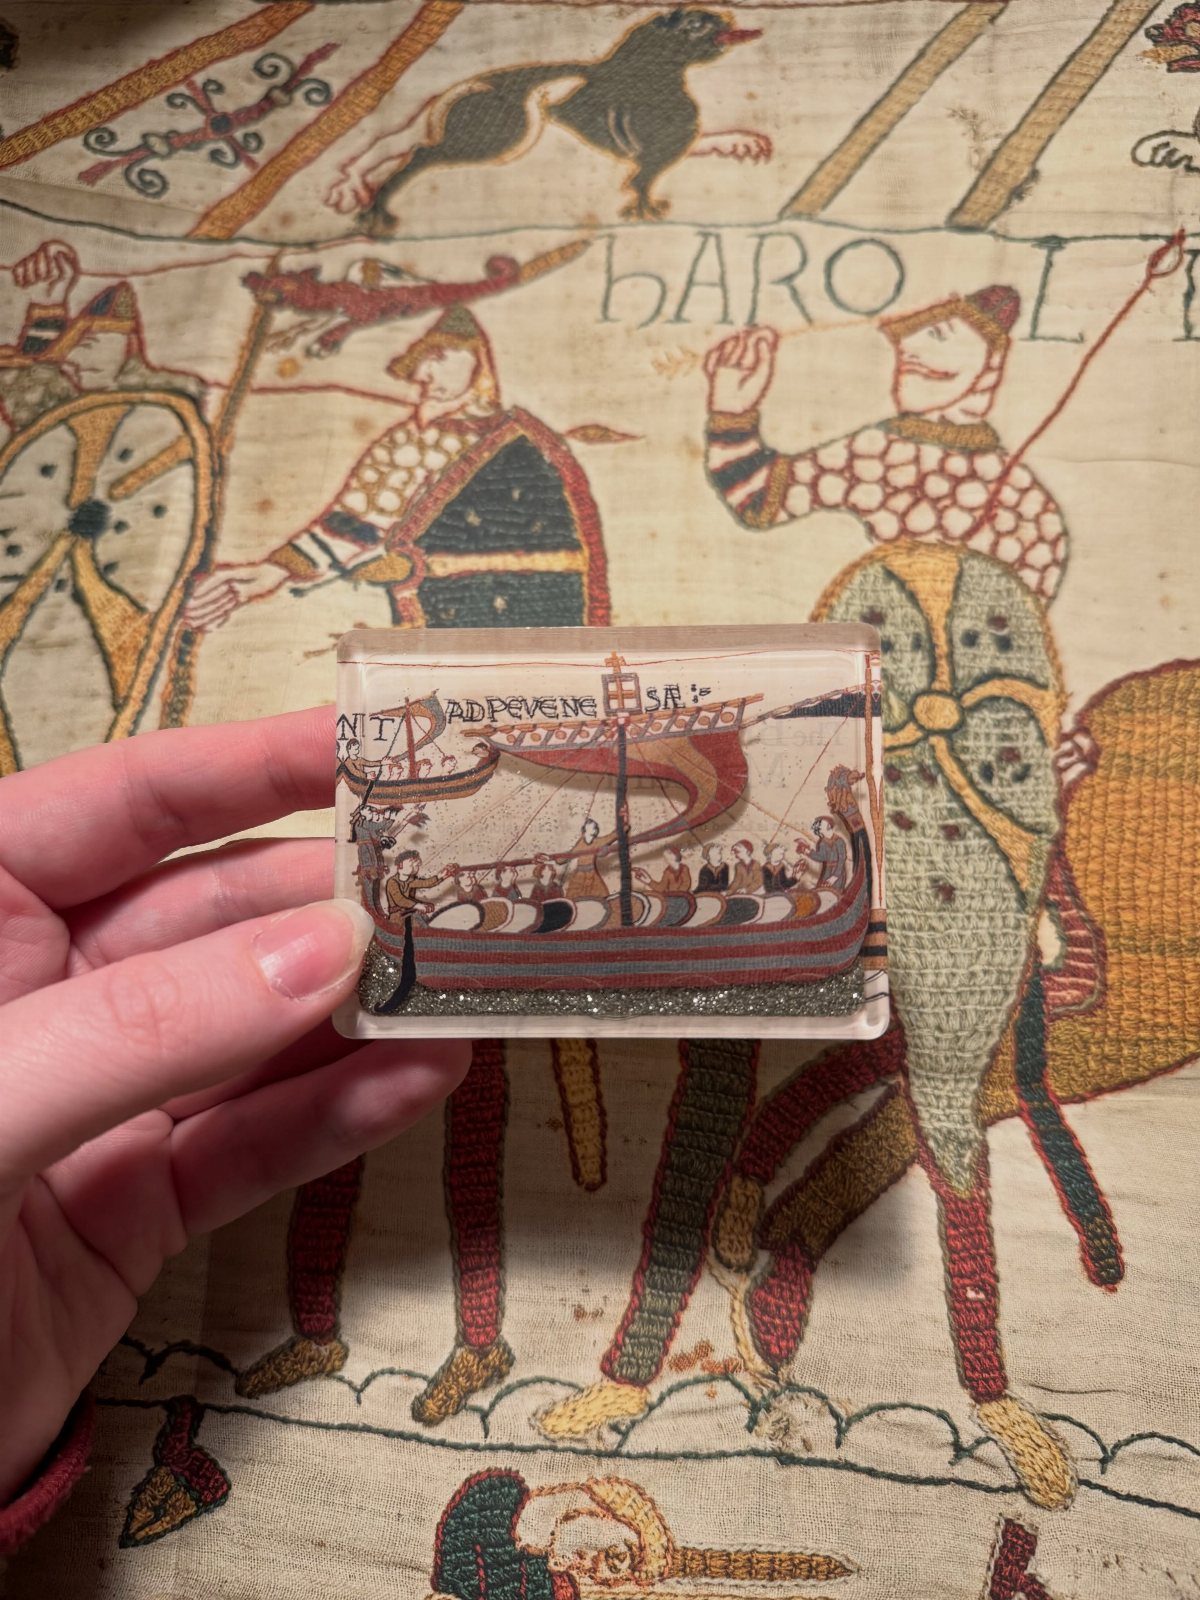
Mod Podge brushed over a printed image, glitter shaken on while wet, a second seal coat after drying: that is the whole method. The result catches kitchen light in a way flat paper cannot.
Fine glitter works better than chunky. The coarse stuff needs more glue to lie flat and still reads rough from across the room.
The second seal coat is not optional. Unglittered Mod Podge dries clear; unsealed glitter sheds onto every hand that reaches for milk.
13. DIY Painted Canvas Magnets
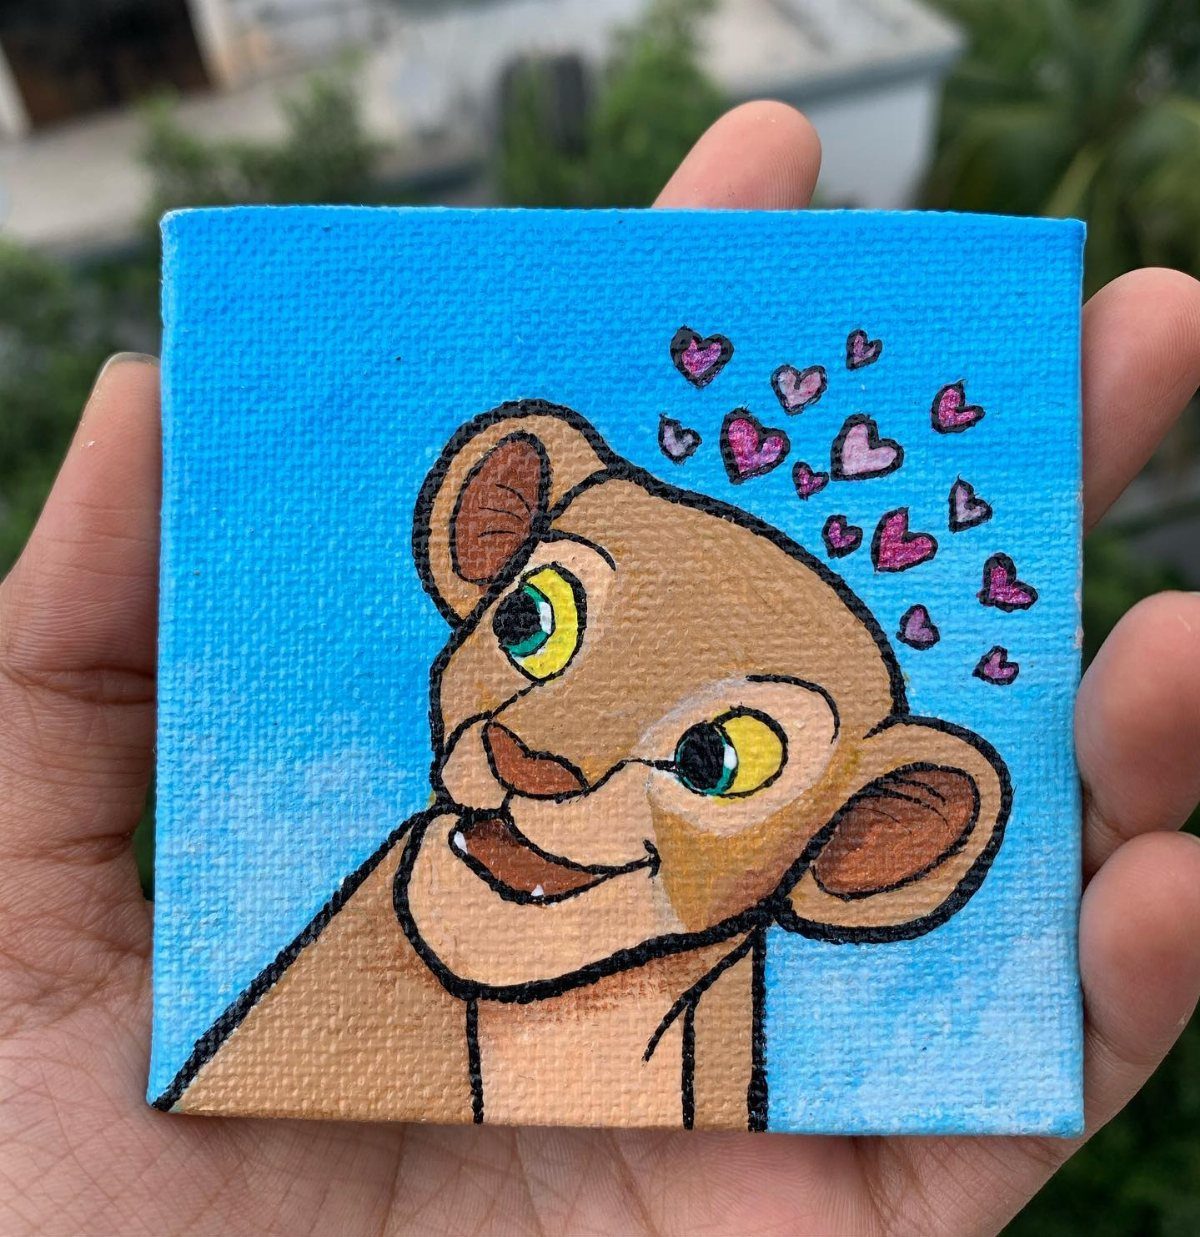
A mini stretched canvas turns into something more interesting than a flat magnet. Acrylic paint dries fast on canvas board, and a strip of magnetic tape on the back holds it flat against the door.
The 2-inch squares at craft stores run cheap, especially on sale, and the woven texture catches light in a way paper cannot.
I like these for gifts because the recipient recognizes the material. A small canvas holds enough detail for a simple shape or a few bold colors without demanding hours of work.
One evening gets you a set.
Acrylic paint works fine; seal it if the fridge tends to splatter.
14. DIY Mini Rainbow Clay Magnets
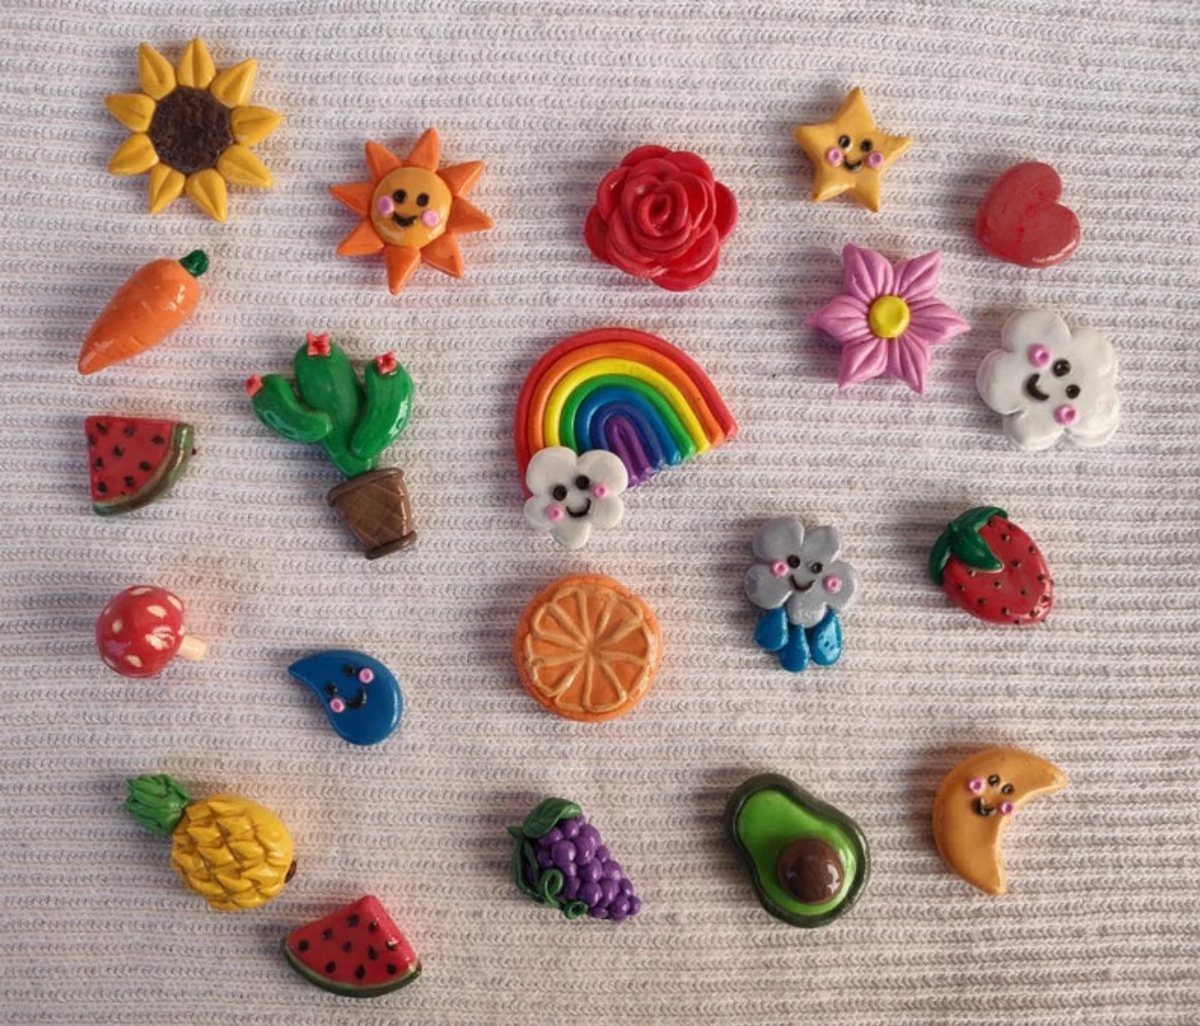
Polymer clay rainbows bake hard and stay bright. Roll thin ropes, press them into arches, and before the oven, use a toothpick to score where clouds might sit.
Paint after cooling if you want softer tones than the clay offers.
Foam clay keeps these pieces light enough that even a small magnet can hold them up. Either material works; foam clay skips the oven but needs longer drying time.
These suit a household with kids old enough to roll consistent snakes. Smaller arches, about an inch wide, hold better on a fridge door than larger ones that catch on sleeves.
15. Antique Frame Magnets
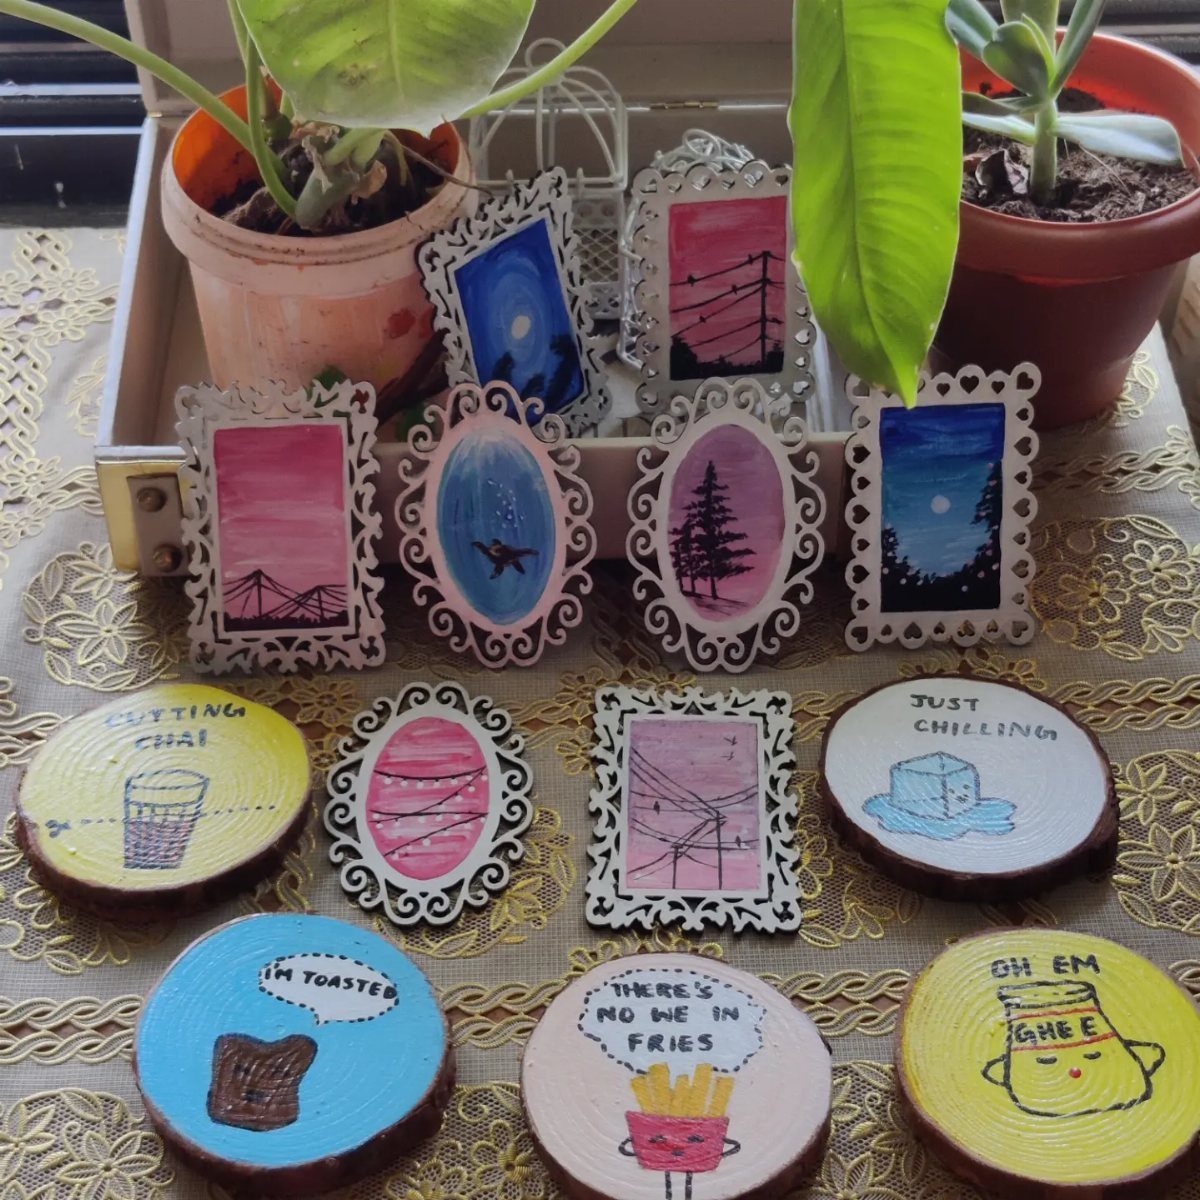
Small frames on a refrigerator look like a gallery wall that happened by accident. Start with wooden craft rings or thin picture frames from a thrift store.
Paint them, distress them with sandpaper, or leave them raw.
Air dry clay works too: press it into simple molding shapes, let it harden, and glue to a backing with a magnet attached. Mod Podge seals paper prints inside if you want images rather than empty frames.
A simple wood disc takes paint well; a small pattern in a second color makes it look found rather than bought. One afternoon, minimal cost, and the result reads as collected over time rather than made in bulk.
16. Photo Magnets
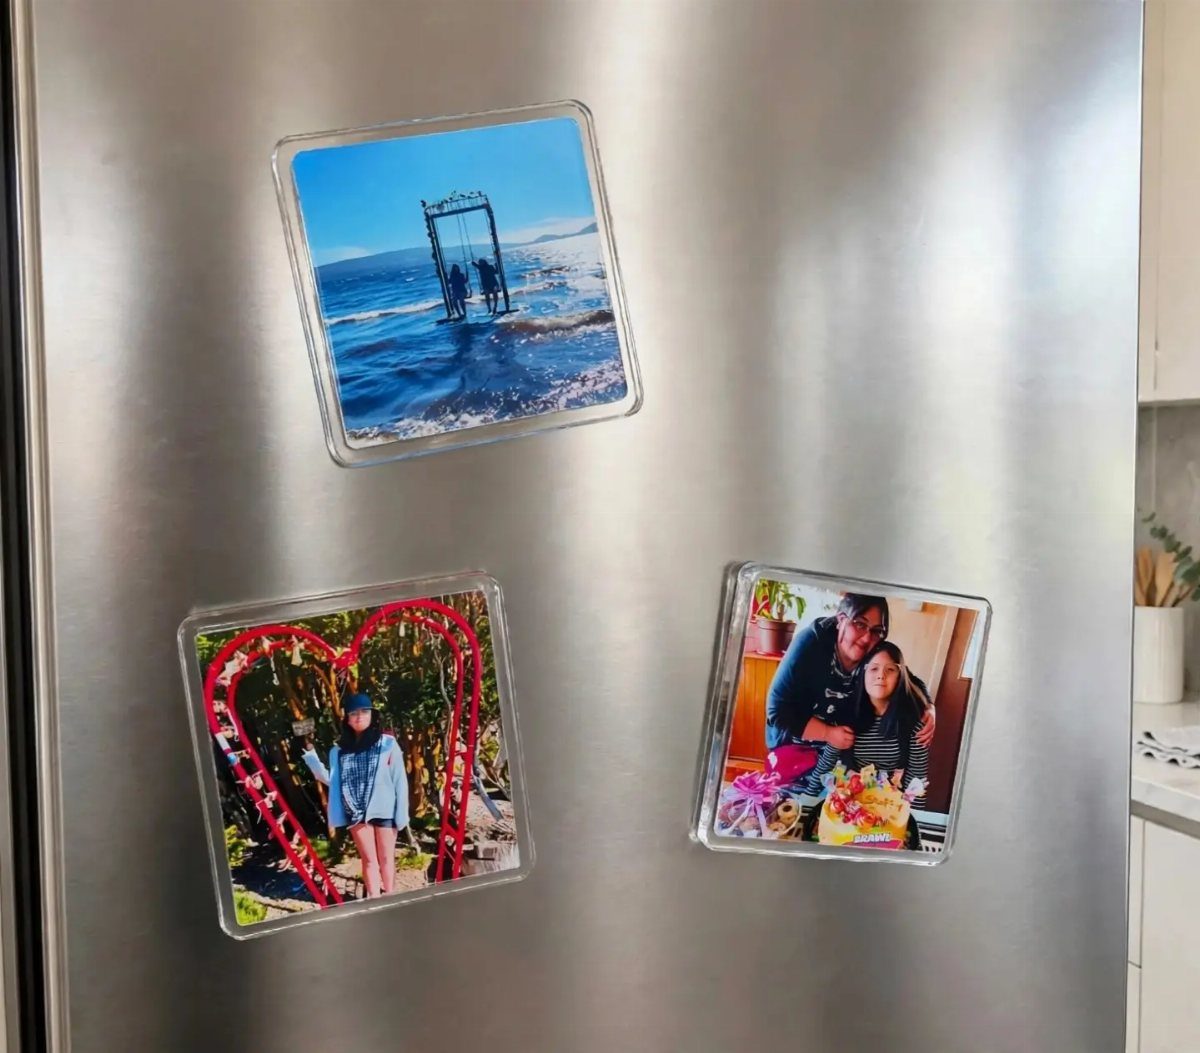
Square photo magnets stick flat and show the whole image without curling. Print at home on regular paper or send out for small squares; the magnet backing does the rest.
These make sense for anyone with a phone full of pictures and no plan for them. A set of twelve covers a good stretch of door and costs less than a custom order.
I give these to grandparents. The photos are already chosen; the making is quick assembly.
17. Salt Dough Magnets
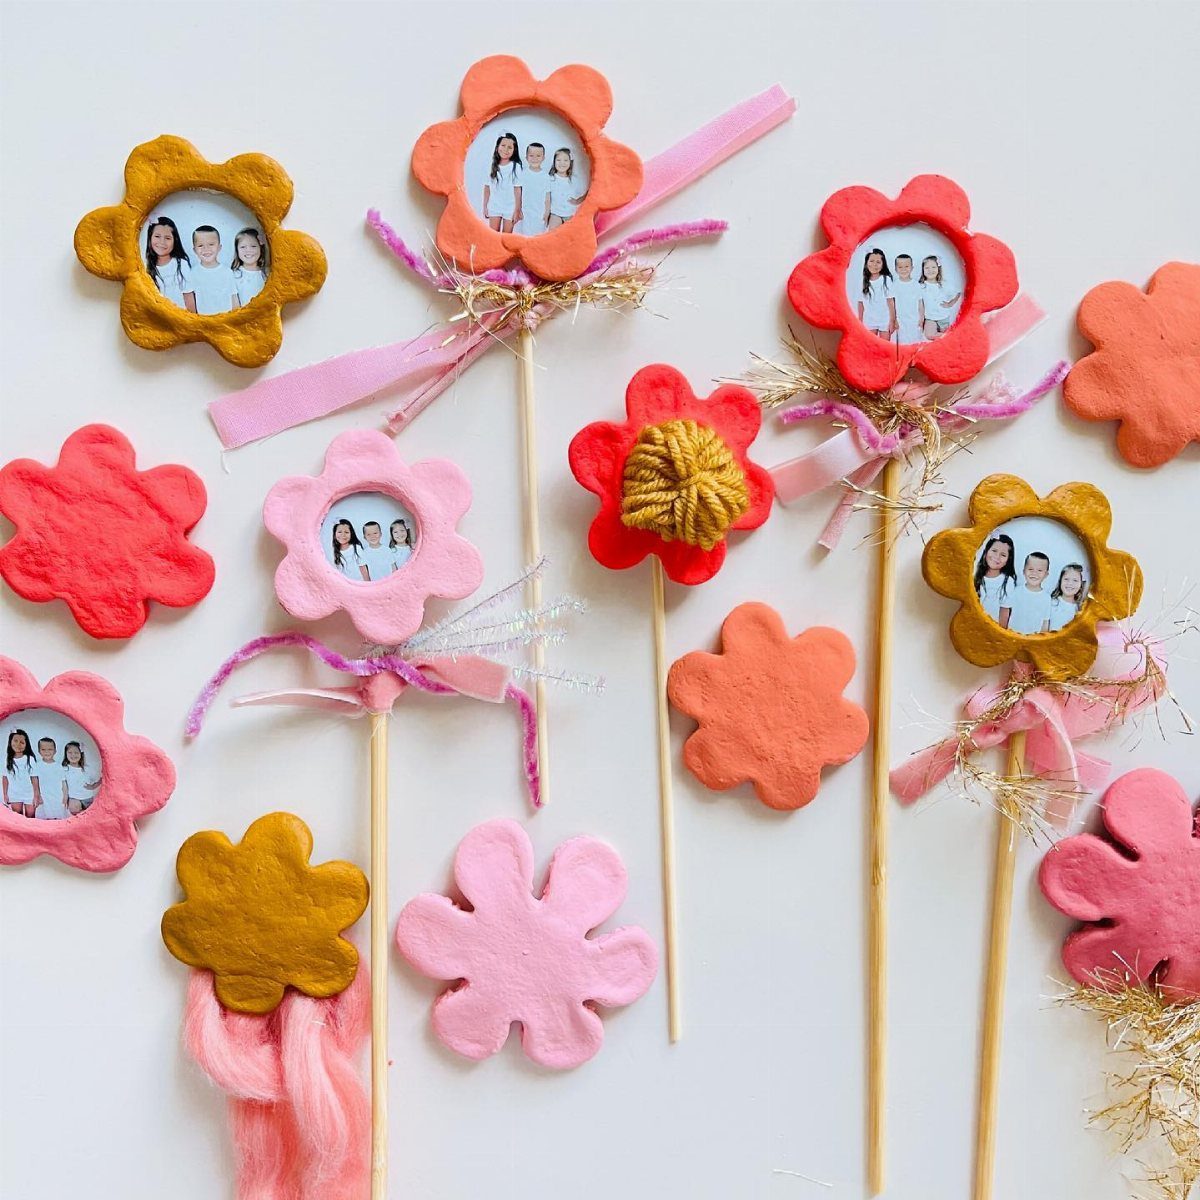
Salt dough costs almost nothing and takes any shape you press into it. Mix flour, salt, and water until it feels like play dough, form your pieces, and bake at a low heat until hard.
Press a small circle flat before baking if you want to leave room in the center for a photo or a name. Ribbon and yarn wrap the sticks for texture.
Neodymium magnets, the silver kind, hold heavier baked pieces. One per small shape does it; larger flowers needs two near the edges, opposite poles facing out so they do not repel each other.
18. Clothespin Magnets
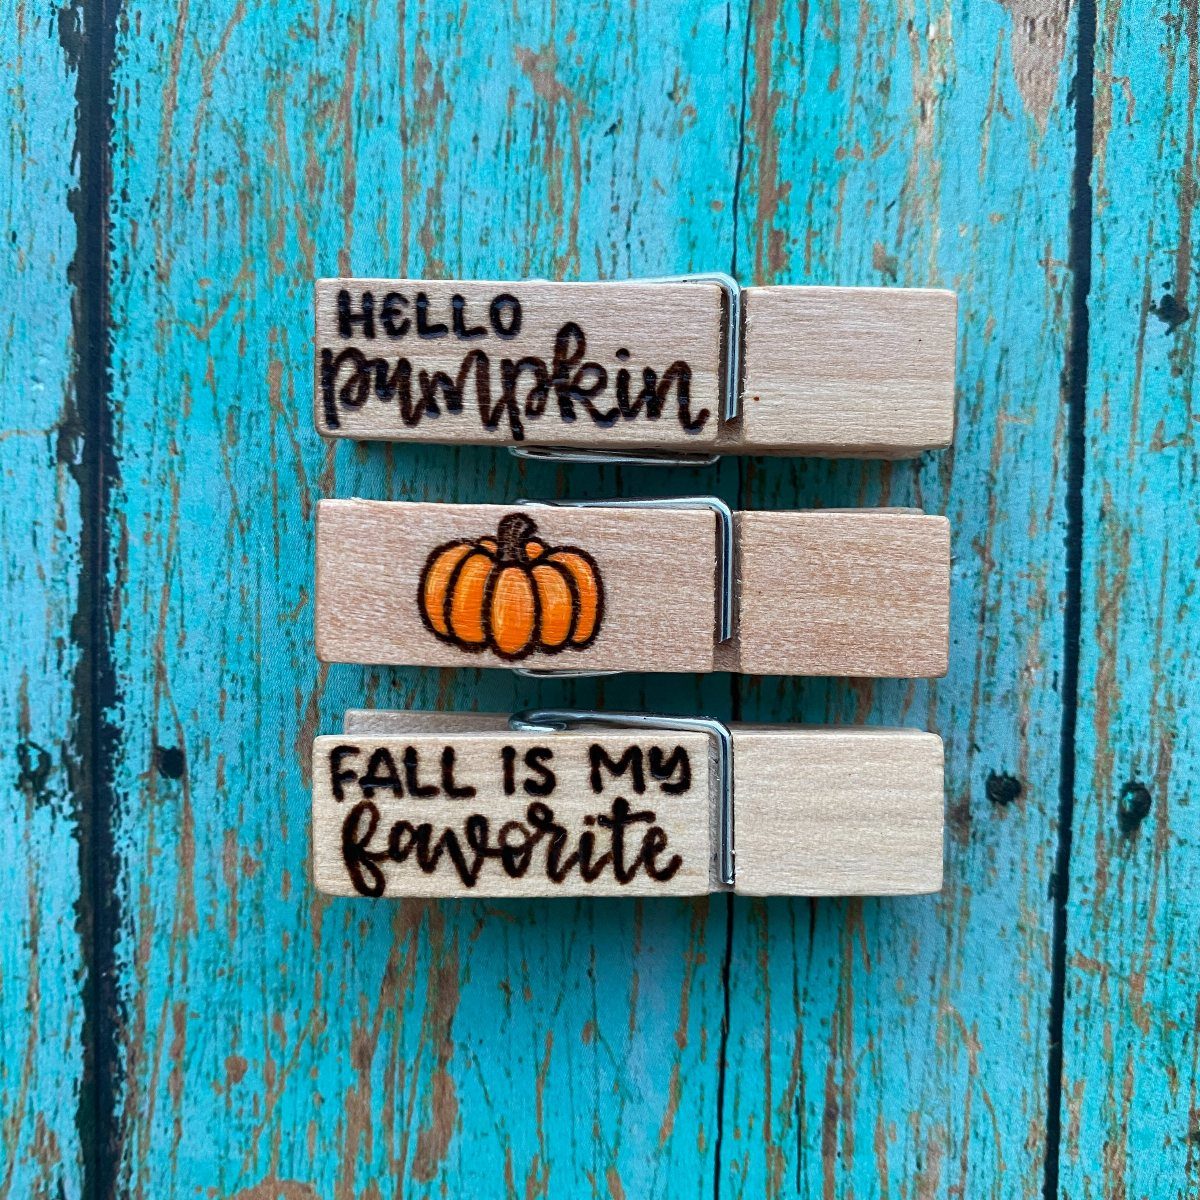
Wooden clothespins with a magnet glued to one side become clips that hold actual paper. Paint them, cover them with washi tape, or stamp words for the season.
A word or two in permanent marker turns a plain clip into a label holder or a seasonal greeting. "Hello pumpkin" works for October; swap it for snowflakes in December and you have a year-round system.
A strip of magnetic sheet on the back lies flatter than a single button magnet. These suit anyone who tapes receipts, school forms, or takeout menus to the door.
The clip does the holding; the magnet just needs to stay put.
19. DIY Dinosaur Magnets
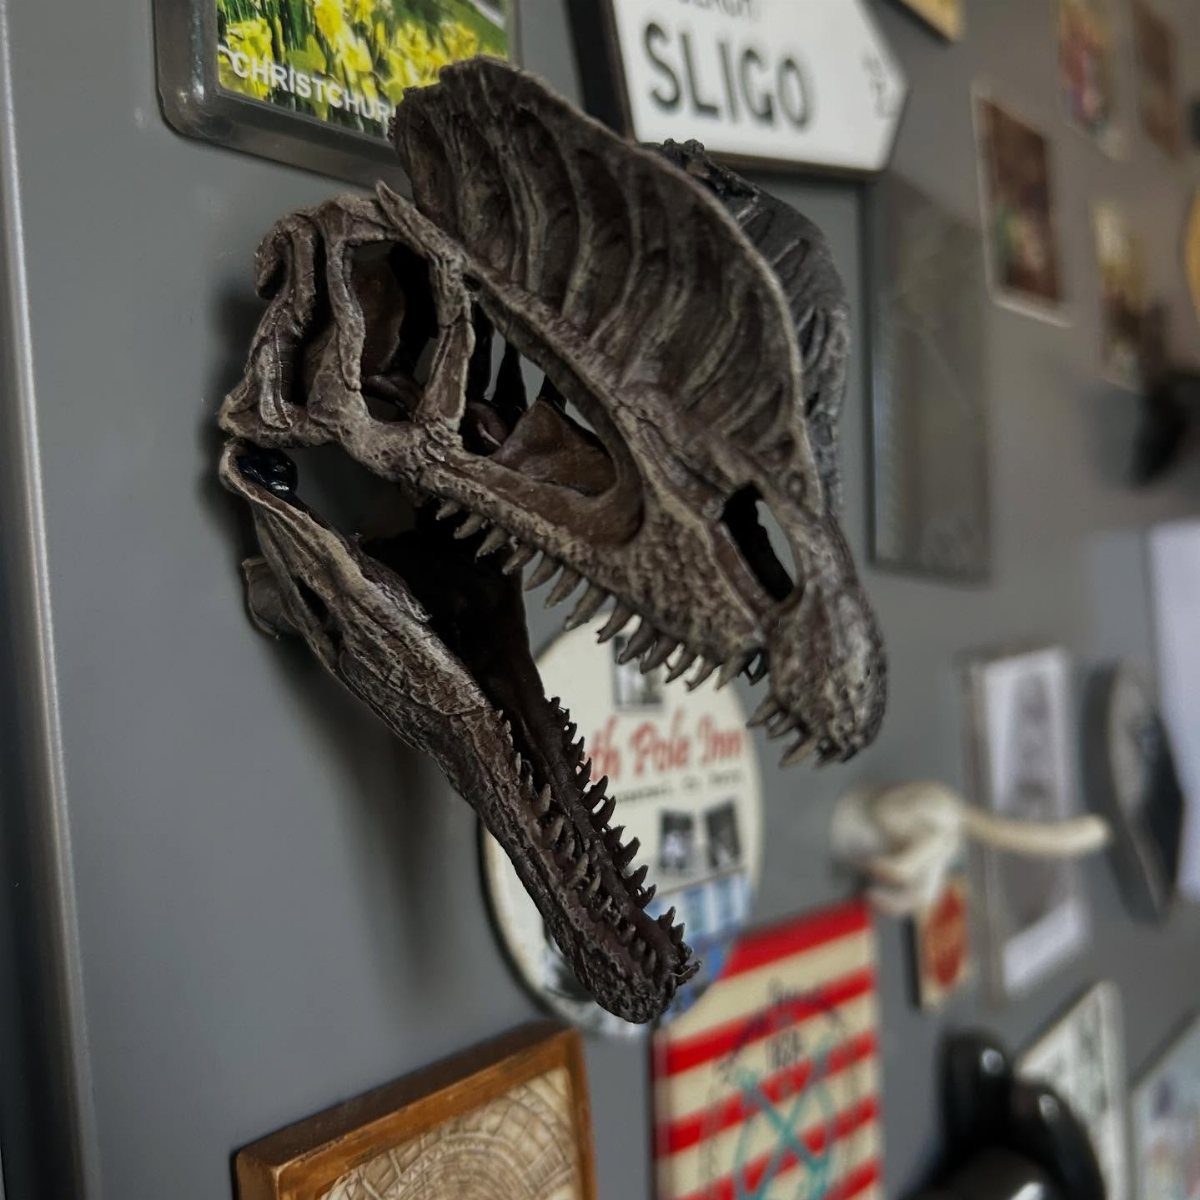
A plastic dinosaur toy, sawed in half and glued to a magnet, turns a junk-drawer staple into something that makes adults smile. I like this one for anyone whose kitchen needs less seriousness, not more refinement.
The work is quick; most of the wait is just paint drying.
Pick up a bag of small plastic dinosaurs at a dollar store, cut each one where the body meets the surface you want flat, sand the cut edge, and hot-glue a magnet disc to the back.
Paint them matte black or metallic gold if you want them to read as decor rather than toy.
One bag of split wood balls makes a full set for the price of a coffee.
20. DIY Pom Pom Magnets
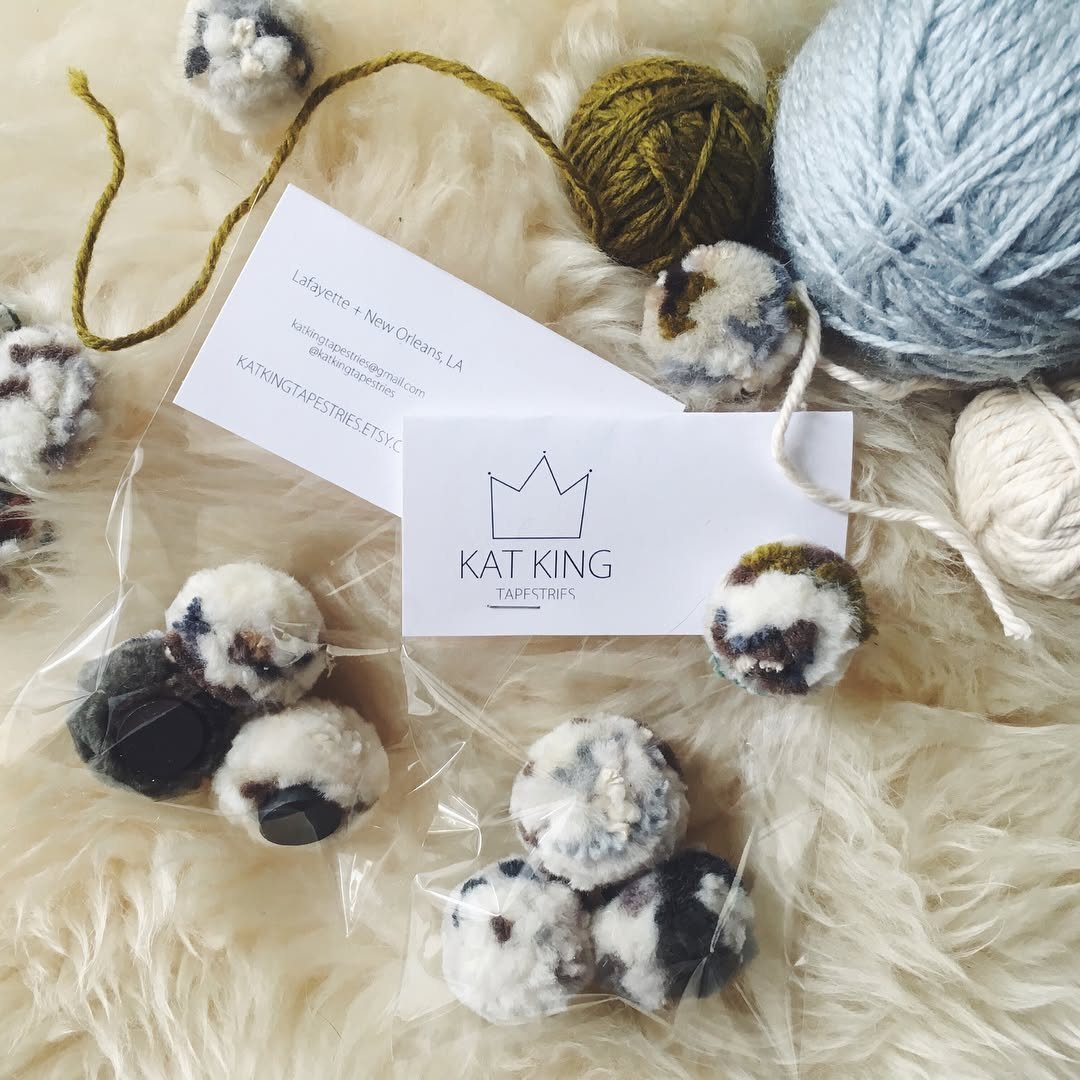
Pom pom magnets add the soft texture that almost nothing else on a refrigerator offers. Leftover yarn scraps keep the cost at zero and guarantee each batch carries colors that will not repeat.
Make the pom poms on a standard cardboard loom or with a fork, tie them off tightly, trim to round, and glue a magnet to the center knot. A dab of fabric stiffener keeps them from flattening against the door.
They work best in a cluster; one lone pom pom looks lost, but six or seven in varying sizes read as intentional.
The yarn determines the personality. Chunky wool gives a Scandinavian feel, while thin cotton reads more playful.
Either way, they pick up lint and pet hair, so they need an occasional shake outside.
21. DIY Wine Cork Magnets
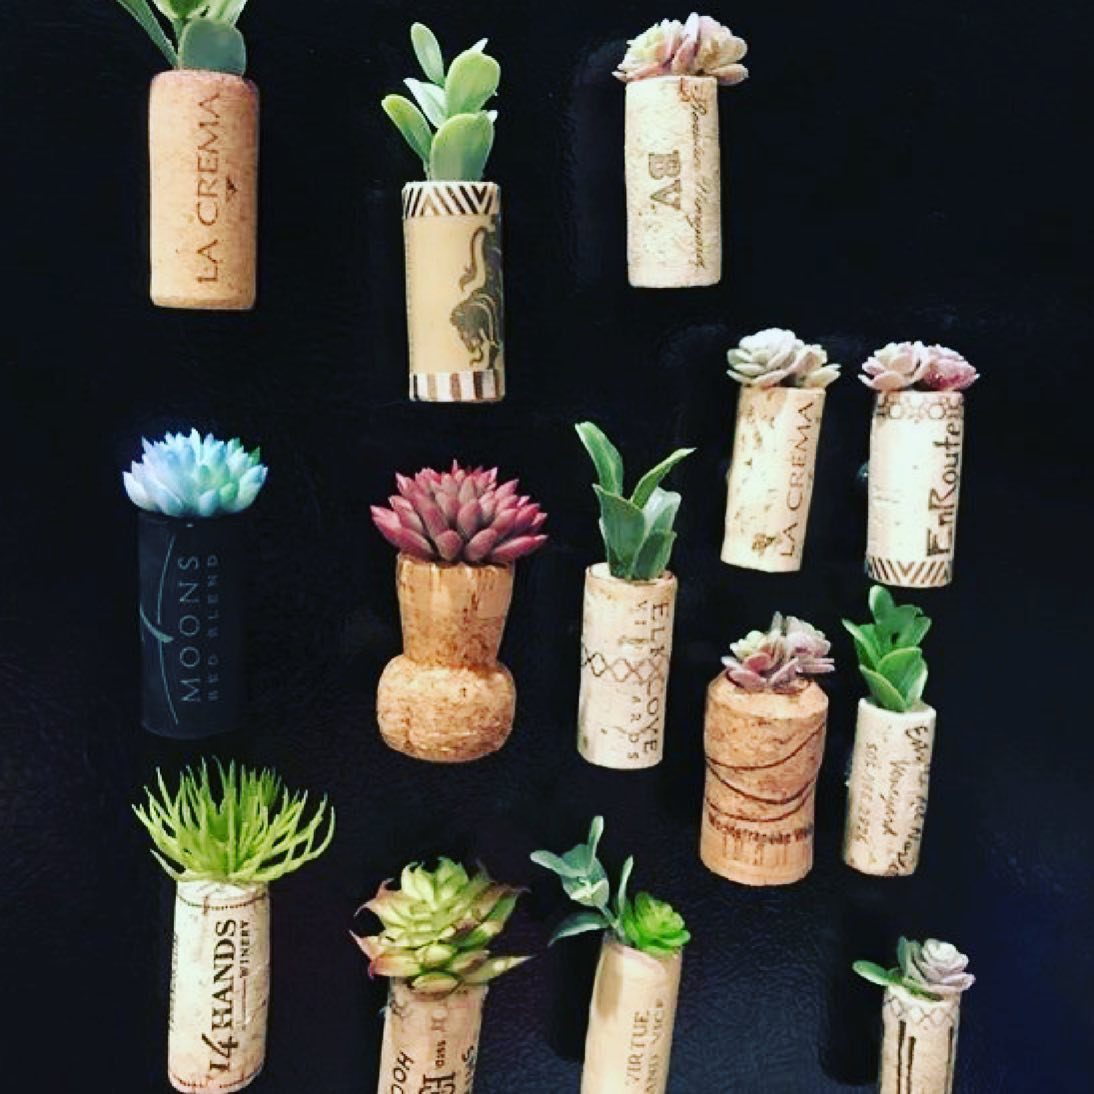
Wine corks with a hollow drilled in one end make planters that weigh almost nothing and cost nothing if you already drink the wine. Real succulents look sharp, though faux ones last longer on a door that gets opened hard.
Drill or carve a cylindrical hole about three-quarters of an inch deep, fill with cactus soil, and nestle in a cutting or a small rooted plant. A strong neodymium magnet, the kind that holds through the cork, keeps it anchored.
Real succulents need watering rarely enough that removing the cork for a sink soak is not much trouble.
The cork’s printed label becomes part of the look. I would sort by color or winery rather than mixing randomly.
22. DIY Succulent Planter Magnets
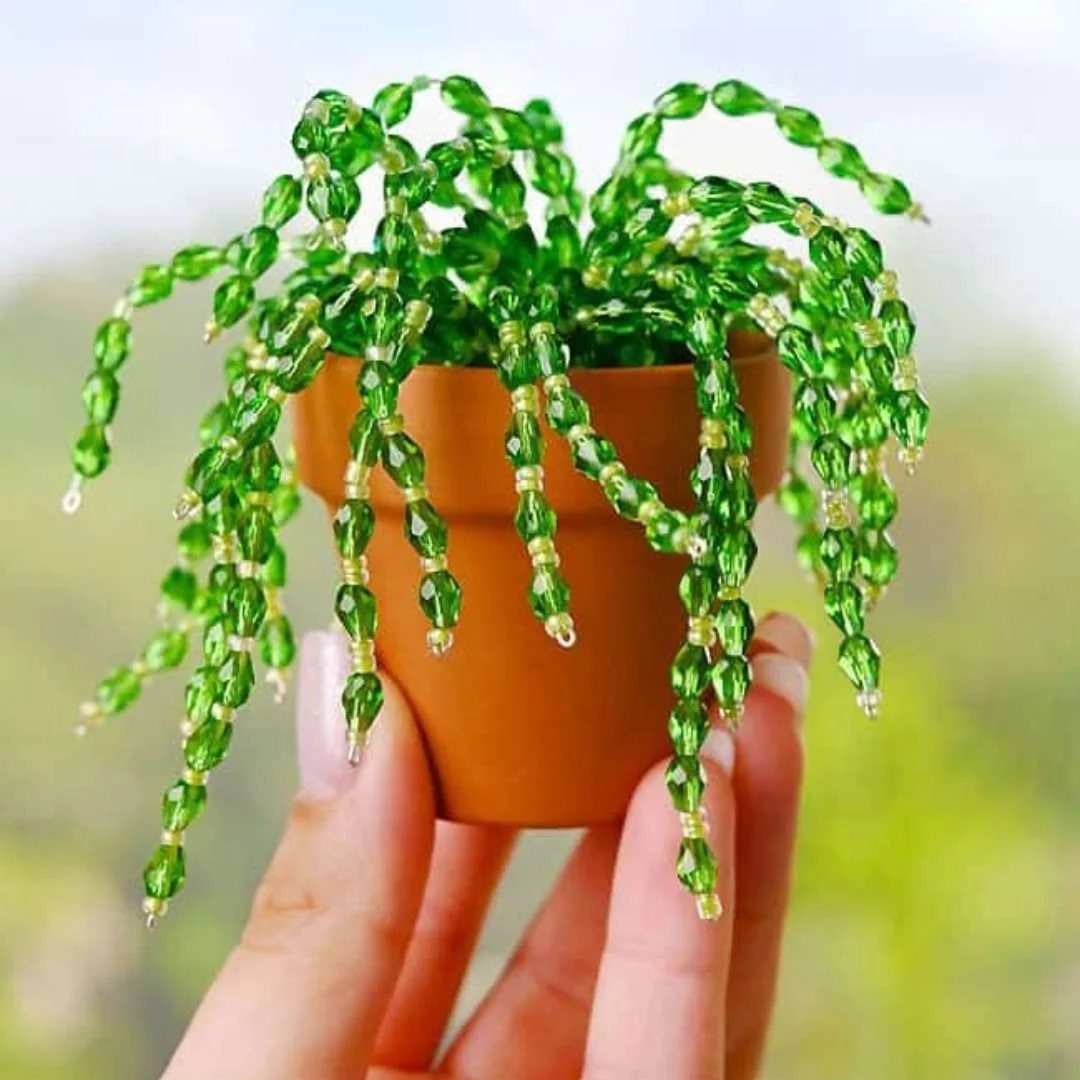
A tiny pot that clings to metal brings green to a kitchen without sacrificing counter space.
Start with a tiny container, anything from a thimble to a miniature terracotta pot. For living plants, glue a strong magnet to the drainage hole and seal it with waterproof epoxy; for dried or fake arrangements, a basic adhesive suffices.
Weight matters here. A wet ceramic pot with soil tips easily, so I would keep the planting light and the magnet heavy.
These suit renters who want living things but lack windowsill space, or anyone who opens the fridge often enough to remember to mist.
Choosing the Right Magnets
Ceramic magnets work fine for paper-thin projects, but anything with weight needs neodymium. A bottle cap magnet that cannot hold its own weight will slide and chip the enamel underneath.
Neodymium costs more per piece, yet one small disc holds up a thick photo stack where ceramic magnets failed.
For clay and resin ideas, I’d skip the craft-store magnet sheets entirely; they are rated for lightweight paper, not a half-inch of air-dry clay. Check pull force before you buy.
A 10-pound rating sounds excessive for a fridge magnet, but that number assumes direct metal contact. Through paint, a layer of glue, and the gap from a curved surface, effective hold drops fast.
Safety Tips for Kids
Small magnets disappear into carpet and reappear in toddler mouths. A bowl on the table keeps small magnets corralled so none wander off mid-project.
Hot glue sets fast, which helps when a child’s attention is already drifting. E-6000 holds better long-term, but it needs overnight curing; that means finding a high shelf away from curious pets.
For the glass tile projects, the magnet sits recessed behind the tile, so a failure sends the whole assembly down, not just the magnet. I press and hold for a full 30 seconds even when the label says less.
The weight of glass plus art plus adhesive adds up, and a weak bond shows itself at 6 AM when the coffee maker lives under that exact spot on the fridge.
Materials for Crafting
Air dry clay is cheap by the pound, enough for two dozen citrus slices or a full rainbow set. Bottle caps cost nothing if you already drink the beer; otherwise blank ones ship in bulk for cheap.
Buttons from a sewing box make good starter magnets for testing whether the hobby will stick. Recycled materials carry a hidden cost in prep time.
Wine corks need slicing, rocks need washing and drying, clothespins need deconstruction. Factor that into the weekend timeline.
For resin projects like the MiniVerse diner sets, the placemat underneath matters more than you’d think. Resin wipes off silicone in seconds; it bonds to wood table grain for life.
Using Strong Adhesives
Craft glue fails on non-porous surfaces. I have the dried puddle marks on my work mat to prove it.
E-6000 remains my default for metal, glass, and glazed clay; it flexes rather than snapping when a magnet gets pulled at an angle.
Hot glue works for porous materials like raw clay or unfinished wood, and the fast set time keeps projects moving. For heavy found objects, two magnets beat one every time.
Place one high, one low, so the piece cannot pivot and peel free.
Industrial glues need a full day; I write the time on masking tape and stick it to the project so I do not forget and test too early. Even magnets with adhesive backing get a glue boost.
That peel-and-stick layer dries out, especially near a stove or dishwasher where heat cycles accelerate the decay.
Frequently Asked Questions
What are some DIY ideas for fridge magnets?
Bottle caps, air-dry clay, wooden squares, and glass tiles all make solid starting points. I like bottle caps for the built-in frame, clay for custom shapes, and glass tiles for pressing kids’ art flat.
Most of these need only craft glue and the right magnet strength, not special tools.
What can I do with all my fridge magnets?
Sort by color or theme and cluster them so they read as intentional rather than accumulated. The pom pom magnets work best in groups of six or seven; one alone looks lost.
If you have too many, the clothespin style actually holds paper, so they earn their space by doing work.
What are some funny fridge magnets?
The ransom note style cuts letters from magazine pages and mounts them on wooden blocks, which turns every grocery list into a threat. Plastic dinosaurs sawed in half and painted matte black or gold make adults smile without trying hard.
Both suit a kitchen that needs less seriousness.
What can I put on my refrigerator to make it magnetic?
A strip of neodymium magnet, the thin silver kind, glued to the back of almost anything flat.
For curved items like wine corks or small pots, the magnet needs enough pull force to grip through the gap; ceramic discs fail on weight, so check the rating before buying.